Creating a Zone
|
|
This task shows you how to create a zone ID. | |
|
|
A zone ID is used to identify and
assign properties to a group of objects. You define a zone ID by creating
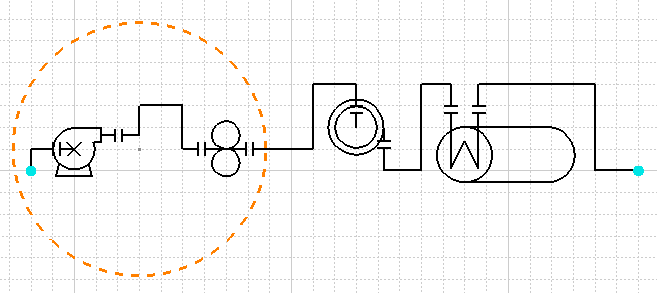
boundaries which enclose the group of objects. In the illustration below
the user has drawn a circle around some lines and components. The circle
defines the boundary which becomes part of the zone. When you assign
certain properties to the zone they will also be assigned to the objects
within the boundaries of the zone.
A zone ID can extend over several documents and contain numerous boundaries. While a zone ID can extend to multiple documents, once you create a boundary, it becomes local, or specific to that document. When you change the boundaries of the zone ID you do it locally so that the change applies to a specific document. Before you create zones you must designate a directory in which they will be stored. See Understanding Project Resource Management. |
|
|
|
1. | Click on the
Create Zone button
|
| 2. | Enter the name for your new zone in the Zone ID field and click on Zone in the Class Viewer. You can accept the default name by clicking Set to default. | |
| 3. | Click the Properties button to enter properties if you want to. Certain default properties will be assigned but you can enter your own if you want to. | |
| 4. | Click OK. The zone will be created. | |
![]()

