 |
This task explains how to
define
and view a
flexible route in your 2-D document.
You can define flexible routes for tubing, HVAC and waveguide lines. This task
describes a tubing line. |
 |
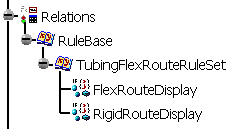
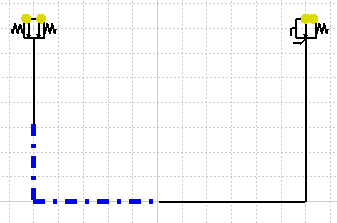
The Manage Route Flexibility
command allows you to specify a
route as flexible. Additionally, the flexible route can be seen in the 2-D drawing.
(The route displays as blue dots and dashes.)
- NOTE: To view a flexible route in your drawing, you must import
the flexible route rules set from the catalog.
- Use
the Import Rules and Checks command. In the Catalog Browser,
select TubeFlexRouteRules and TubingFlexRouteRuleSet.
Click OK on the Rule Base Catalog dialog box. You see the rule set display under
Relations in the specifications tree.
-
-
|
 |
To
define a flexible route in your 2-D document: |
|
|
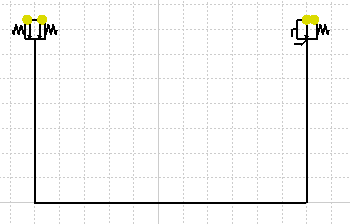
1. |
Route a tubing line
between two components.
 |
|
|
2. |
Select the route and click the Manage Route Flexibility button
 . .
The route displays as a flexible
route. (Blue dots and dashes replace the original lines of the
route.)
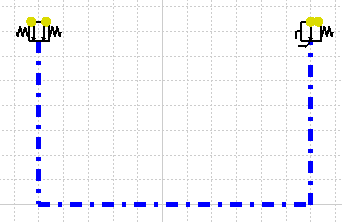 You
can verify that the route is a flexible route by checking
Properties. The Flexible field in the
Properties dialog box
indicates True.
- NOTE: To define a route as flexible, you must use the Manage Route Flexibility
command. You cannot change the attribute in the Flexible
field.
|
|
|
You can have the flexible route
revert to a regular line by selecting the route again and
clicking the Manage Route Flexibility button. The route is no longer a
flexible route. You see that the original line replaces the blue dots and
dashes. |
|
|
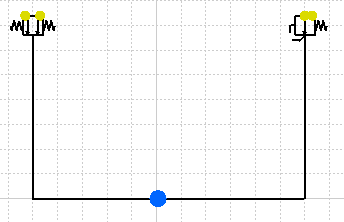
You can define part of a route as
flexible. |
|
|
Click the Manage Route Flexibility button and select the first
point on the route. A blue circle displays at this point.
 |
|
|
Select the second point on the
route. The blue dots and dashes indicate the part of the route that is
flexible.
|
|
|
|