 |
This task shows you
how to view related objects in a design. The direct
parent and child/children of the active object are considered related
objects.
|

|
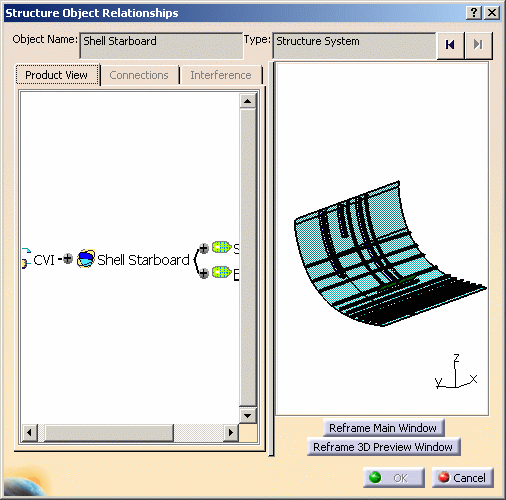
1. |
With your
document open in the System Design workbench, double click to make a
document or object active, and click the Structure Object
Relationships button
 . The
Structure Object Relationships dialog box displays, with
the active object and its parent/child displayed. (Click the Product
View tab if it is not selected.) . The
Structure Object Relationships dialog box displays, with
the active object and its parent/child displayed. (Click the Product
View tab if it is not selected.)
 |
|
2. |
Double click on
any object to see what it is related to. You can double click in the graph
viewer or the 3D preview. The image changes in the 3D viewer to display the
active object, and the related objects are graphically displayed.
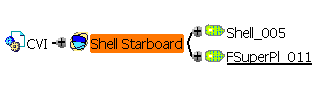
The Object Name and Type fields
display the name and type of the active object. |
|
3. |
You can use the
forward or back arrows next to the Type field to navigate the
design. |
|
4. |
To highlight the
geometry of any object, click once on the object in the graph viewer. Its
geometry will highlight in the viewer. |
|
5. |
You can expand
or collapse the display in the graph window by clicking the (+) or (-)
signs next to each object. This does not change the active object. |
|
6. |
The Reframe
Main Window button allows you to change the view and zoom level of
the object displayed in the main CATIA viewer to that of the Structure
Object Relationships dialog box. |
|
7. |
The Reframe
3D Preview Window allows you to reframe (center) the image in the
Structure Object Relationships dialog box. |
|
8. |
You can print
the tree that displays in the graph viewer. To print, right click in the
viewer and, in the drop down menu that displays, select Print Whole. |
|
9. |
Click
Cancel to exit the command. |