 |
This task shows you how to import
a Drafting view.
|
 |
This function allows you to import
a 3-D document view into this application. It can be used to import the
outline of an object, such as the deck of a ship or aircraft, within which
you want to work. If the document has zones, the zone information will also
be imported. Before importing the document you must drop it off into a
Drafting document. See appropriate documentation on how to do that. This
function will then take the Drafting document and import it into this
application. You cannot change the profile of a zone once you have imported
the document. You can, however, perform other functions within the zones.
And you can scale the view - make it larger or smaller - as well as move it
around. |
 |
1. |
On the menu bar, click Insert -
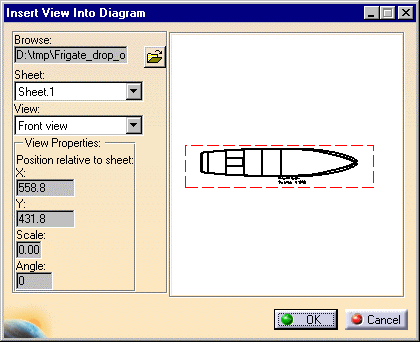
Drawing - Existing View. The Insert View Into Diagram dialog box displays
(shown below). |
|
2. |
Click the Open button and navigate
to the directory where your Drafting document is located and open it. The
document will display in the window. In the image below it is the deck of a
vessel divided into zones.

|
|
3. |
Click on the down arrow next to the
View field and select a view. If the document has more than one view, you
must import the ones you want, one at a time. |
|
4. |
If the document has more than one
sheet, you can select a sheet in the Sheet field. If that sheet has more
than one view, select the view. |
|
5. |
If you want to change the
properties as displayed here change them in the Drafting document using
Drafting commands and repeat this procedure. |
|
6. |
Click OK. The view will
display in this application. |
 |
If a change has been made in the
3-D document, but is not reflected in the schematic version, then an
update symbol appears in the specifications tree, as shown below.
(Both documents have to be in session.)

To synchronize the two documents, right click on the document in the
specifications tree and click Update Selection in the drop down menu. |
![]()