Defining 2D Endstyle Symbols
|
|
This task shows you how to create your own endstyle symbols. | |
|
|
Some endstyle symbols are provided with this application. if you want to create your own, single or double line, symbols then follow the procedure described below. As of Release 14, you can customize only endstyle, center of gravity and fabrication break symbols. | |
|
|
1. | You will first need to create a catalog, using
the standard catalog facility provided. Click Infrastructure - Catalog
Editor in the menu bar to open the editor, and then open the CATfct file
for the application, in this case Piping. To open the CATfct file click the
Open User Dictionary button
|
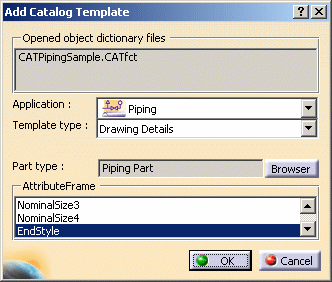
| 2. | Click the Add Catalog Template button to
display the Add Catalog Template dialog box and make sure the entries match
those displayed in the image below.
Click OK to create a catalog. |
|
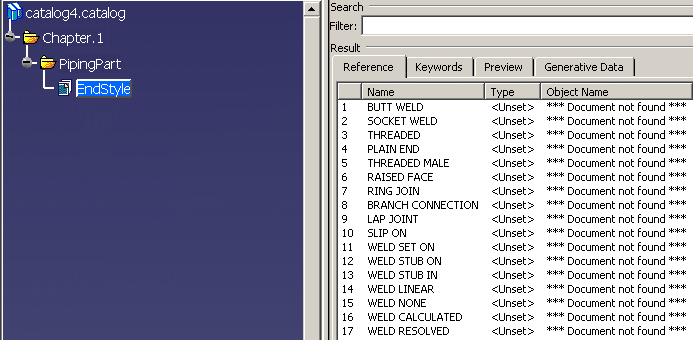
| 3. | Select Endstyle in the specifications tree and
the Reference tab to display all the part descriptions.
Delete the descriptions you do not need - right click on a description and, in the drop down menu, select Remove Description. |
|
| 4. | You now have to link the remaining
descriptions to an actual drawing. You do this by double clicking on the
description to bring up the Description Definition dialog box and following
steps explained below. One sequence you could follow is:
|
|
|
|
||