Defining the Part Type
|
|
This task shows you how to define a part type. | |
|
|
You can only define the type of a part that does not already have a type assigned to it. This means that the part must be newly created, or it should be an existing part that has no type assigned (such as a CATPart from a product such as Systems Routing). Piping Design is used as an example here. Substitute directories as needed. | |
|
|
1. |
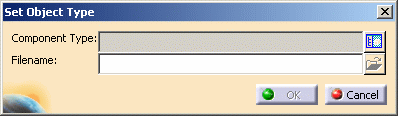
Click the Set Object Type
button
|
| 2. | Click the Open Existing Part button next to the Filename field and navigate to the part you want to modify. Click Open on the File Selection dialog box. The file will display in the Filename field. | |
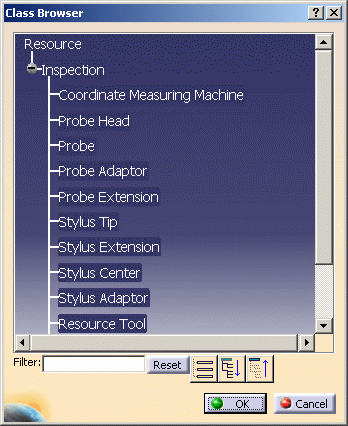
| 3. | Click the Display Class Browser button next to the Component Type field. The Class Browser will display. | |
| 4. | Expand the tree in the Class Browser and select the part type that you want to assign to the part. Click OK. The type will be assigned. | |
| 5. | Click OK in the Set Object Type dialog box. | |
|
|
At this point a copy of the part is saved in
the CATTemp directory under C:\..\..\Local
Settings\Application
Data\DassaultSystemes.
Proceed with the Build Part cycle, i.e., Define Properties, Formulas, associate a Design Table, manage Override Parameters, Define Connectors, Associate Specifications to the Connectors, and Manage Graphic Representations (as applicable). |
|
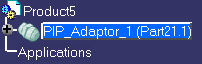
| 6. | To save the part, activate the part level in your product,
then click File - Save As.
Save the part in \..\..\intel_a\startup\EquipmentAndSystems\Piping\PipingDesign\ |
|
| 7. |
FOR EQUIPMENT ARRANGEMENT ONLY You can select the part in your document to bring up the Class Browser. This will only work if the part you select has not had a type assigned to it, such as when you are building the part. Also, note that when you use this method of assigning a type you will only be able to assign the Resource type. You will not be able to select any other type. To follow this procedure, click the Set Object Type button (in the Create Part dialog box or in the toolbar). The Set Object Type dialog box displays. Click the part to display the Class Browser and select the type. You can continue building the part.
|
|
|
|
||