Routing in 3D with the Compass
|
|
This task shows you how to use the compass to route in any direction. | |
|
|
1. |
Click the
Route a Run
button.
The Routing dialog box is displayed. |
| 2. | Click the Directional
Routing button.
|
|
| 3. | Select the type of run and enter other values. See Routing a Run for more details. | |
| 4. | Click at the point where you want to start
your run from. This places the compass at that point.
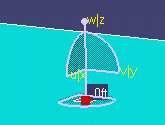
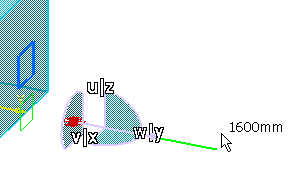
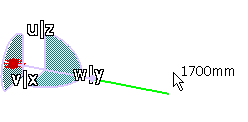
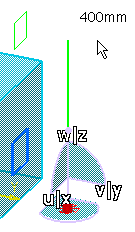
To begin routing click and drag the compass so that its Z axis (it may read W) is pointing in the direction in which you want to route. To change direction, drag the Z (or W) axis of the compass, or press the Shift key repeatedly until the desired axis is highlighted.
|
|
| 5. | Double click, or click OK to end your routing. | |
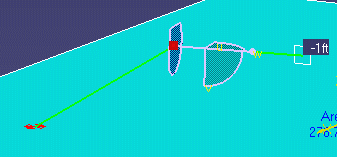
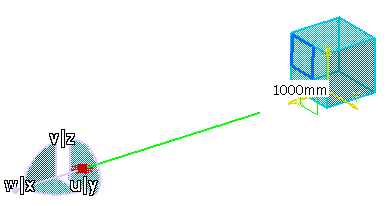
| 6. | If you place an offset plane, and route normal to the
plane, you will see the offset distance you have routed. This distance is shown
in increments of the value entered in the step
input box.
If you route parallel to the offset plane the grid step is not effective. In this case you will continue to see the offset distance between the plane and the point at which you started routing parallel to it.
|
|
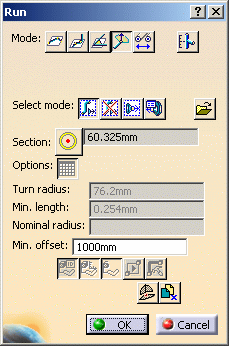
| 7. | Placing an offset plane also displays the
Min. Offset field in the Run dialog box.
You can limit how close to an offset plane you can route by entering a value in this field. As you can see in the images, the user has entered 1000 mm, and he cannot route closer than 1000 mm to the offset plane.
|
|
|
|
You can also double click on the compass to bring up the Compass Manipulation dialog box, which allows you to enter values to modify compass direction and/or location. | |
|
|
||