Set Working Units and Grid

This task describes how to set your working units.  
1. Select Tools - Options and expand the General node. Select Parameters and Measure then click the  Units tab. 
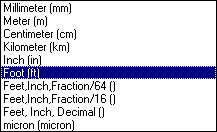
2. Under Magnitudes, select Length  and click the drop down arrow to set the unit of measure you will be using; Foot, Meter, etc.
3. Now, scroll down the list in Magnitudes and select Area. Select the unit of measure you will be using for area. Note: This is normally consistent with the Length standard.
4. To set the Grid Step, under Options, select  Equipment & Systems and click on the General tab.
5. Enter a value for the Grid Step field; for example, 1 ft. The grid step is the increment used for snapping (to grid). Imagine a grid placed over your workspace, consisting of squares. The value you enter in this field becomes the distance between the lines of each square.

If you enter 1 ft then when routing, the run will extend by 1 ft at a time.  Runs begin, end and turn at grid intersections (there are ways of overriding this). Similarly, when placing parts in free space (as opposed to on a run), they will place at grid intersections.

The grid step setting will display in the General Environment toolbar at the bottom of the 3-D viewer. You can change it in the toolbar during your session but the new value will only apply to your current session.  If you close the application and reopen it, the toolbar will again display the value in the General tab page.

These will be your default settings and will remain in effect until you change them. 
6. Click the OK button to complete the customization of the working units.