-
Launch the Integration Tool Setup utility.
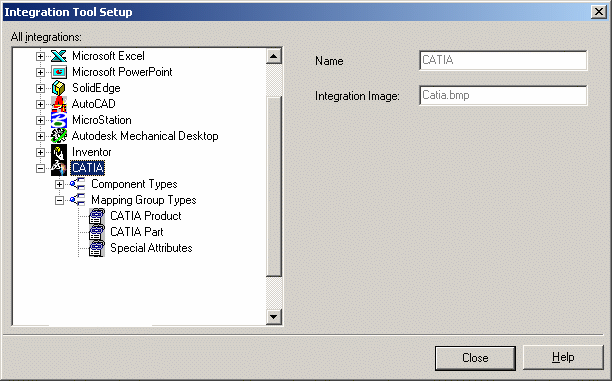
The Integration Tool Setup dialog box appears: -
In the tree displayed, right-click on Mapping Group Types and select Add mapping group type.
The Map Group Type dialog box appears. -
In the Name: field, enter the group type name CATIA Drawing as shown:
-
Click OK.
-
In the tree, right-click on the CATIA Drawing item and select Open groups tree.
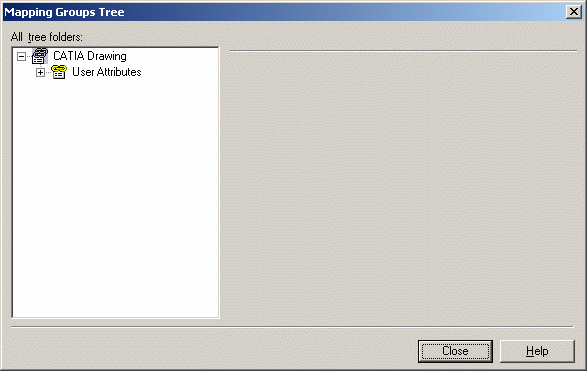
The Mapping Groups Tree window appears. -
In the tree, right-click on CATIA Drawing groups and select Add.
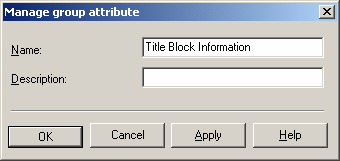
The Manage group type window appears. -
In the Name: field, enter a meaningful name, for example Title Block Information:
-
Click OK.
-
To define the CATIA Formula property
 as Type, go to the tree and right-click on Title Block
Information
 -
Select Add.
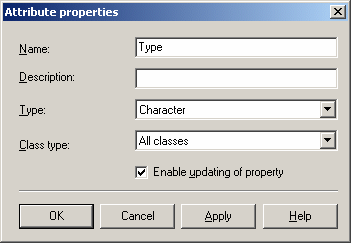
The Add Title Block Information property dialog box appears. -
Enter Type in the Name: field.
The name of the mapping property must be identical to the corresponding CATIA Formula property .
. -
Select Enable updating of property if not already selected.
A CATIA Formula property
 can thus be updated after a change to a SmarTeam attribute.
 -
Click OK.
-
Go to the tree and right-click on Type then select Add.
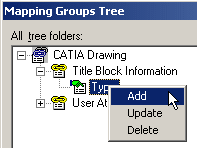
This defines as Drawing Type the SmarTeam attribute to be linked to the CATIA Formula property
 .
.
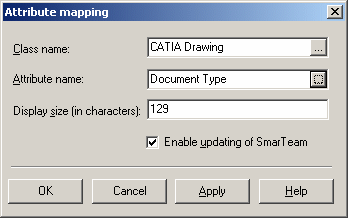
The Attribute mapping dialog box appears.
-
Click the button to the right of the Class name field and select the class name CATIA Drawing from the Class Tree window that appears.


-
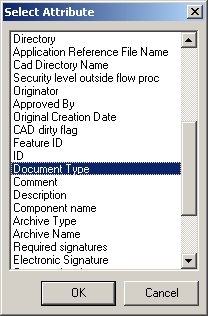
Repeat the previous operation for the right of the Attribute name field: select the attribute name Document Type from the Select Attribute window that appears.
Note that the list of the possible attributes is specific to the selected class name. -
Click OK.
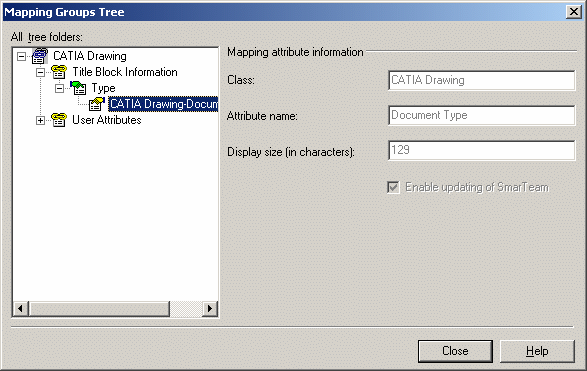
The Mapping Groups Tree window appears: -
Repeat steps 9 through 16 for all other mapped properties.
Here is a list of all the other properties to be mapped:
Property Name
in CATIA 
Enable
Property Update Attribute Name
in SmarTeam Enable
SmarTeam Update Designer
yes
ID

Date
yes
Creation Date

Drawing_Title
yes
Title

Scale

Scale
yes
Once this has been done the CATIA Drawing Mapping Groups tree dialog box should look like this:
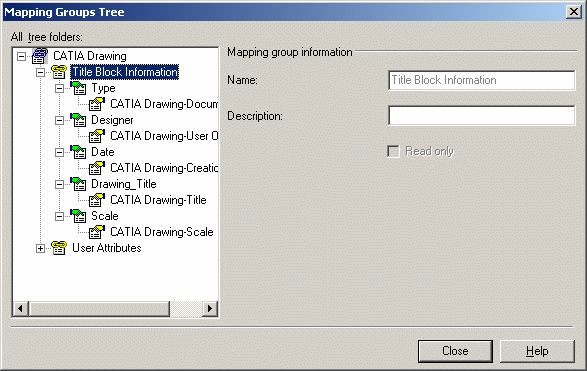
As you can see, mapping of the CATIA properties and the SmarTeam attributes has now been completed.
 |
A mapping group type i.e. a set of mapping groups, applicable to a specific SmarTeam class must now be defined that corresponds to the CATIA Drawing class.
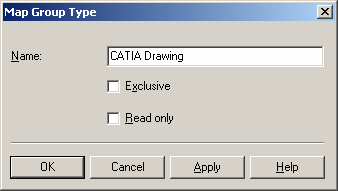 |
The name of the mapping group type must be identical to that of the SmarTeam Class it applies to.
 |
 |
The name used should help you organize the different mapped properties you have to manage.
 |
 |
 |
 |
The following table is a summary of the steps that have just been performed.
|
Mapping |
Enable |
Mapping |
Enable |
|
Type |
yes |
Document Type |
|