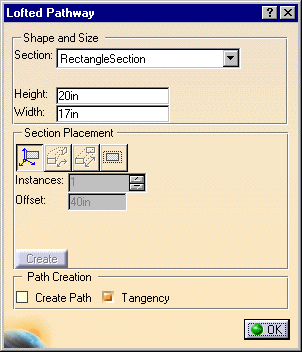
Free Space: A section will be placed at any location where you click.
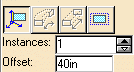
You can place more than one section at a time by entering the number in the Instances field. Specify the distance between them by entering a value in the Offset field. You can use this option after you have placed at least one section, and in this case you must click the Create button to place the sections.
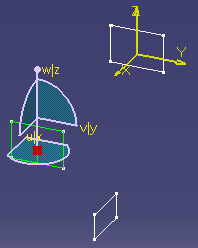
When you create the first loft section, you are placing it relative to
the global compass. The global compass is visible in your product as the
origin. 
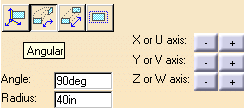
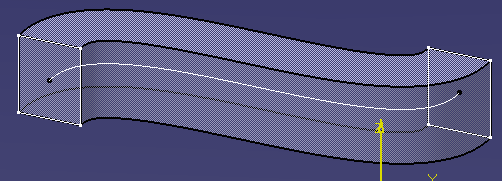
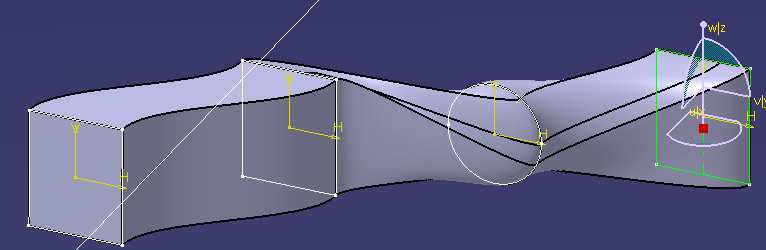
The "global" compass is that which determines the relative XYZ position of your product. When you place loft sections, a "local" compass resides with the last section placed. It is the angle relative to the local compass that determines the position of the next section. The (-) or (+) buttons in the Angular mode follow the "right-hand rule" convention (with your thumb being the axis and the natural direction of the fingers being the positive (+) angle). In the example below (left), two sections have been placed along the global Z axis (positive). The Angular mode has been activated and the Z or W (+) button pressed to create a section at 90deg (about the w/z axis) relative to the previous section placed. In the image below (right), the section was placed activating the Y or V (-) button. The rotation is about the v/y axis.
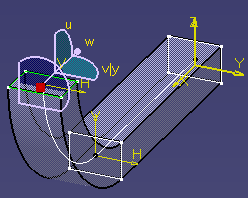
This may well take some getting used to. Experiment with the angular mode in all axes and using a negative value in the Angle field.
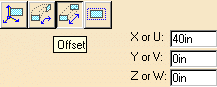
Offset: This function allows you to place the section offset a specified distance from the last section placed. It can be offset along the X, Y and/or Z axis. The distance is specified in the field next to each axis. The section will be previewed. Click Create when you want to place the section.
Existing Section: If you want to link your loft to an existing section, click this button and then the section to which you want to link.
If you check the Tangency checkbox, the lofted pathway will be perpendicular to a section and the pathway will be more "spline-like". If you uncheck the box the pathway will be more angular. The pathway below was created with the tangency option checked.
![]()