 |
This
task shows you how to create a first series of shapes making up the
structural frame of your foundation. These shapes will all be created by
selecting existing support elements, i.e. grid lines. To create shapes,
you also need to define the shape section. Our scenario uses only one
section which you will load from a catalog into your document. |
 |
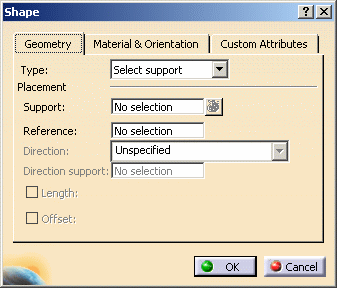
1. |
Click the Shape
 button.
The Shape dialog box appears. Set the Type
to Select Support. |
| |
|
 |
| |
2. |
To select a section,
click the Material & Orientation tab.
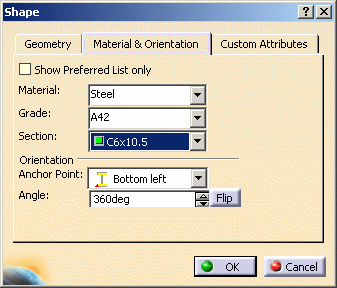
Click the down arrow next to the Section field, and
More in the menu that displays. The Section List
will display, showing the sections available to you. Select a section.
For the purposes of this exercise the section displayed in the image
above was selected. Select an anchor point - Bottom Left was selected in
this exercise. |
|
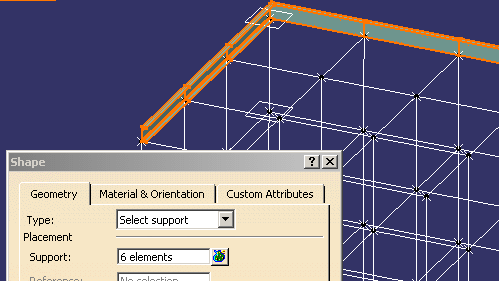
3. |
Return to the
Orientation tab and select a grid line as support. The section
will be placed on the support. Select as many grid lines as you want.
The image below shows that the user has placed sections on two sides of
the grid. Note that the Support field shows he has selected
six supports. You can click on the bag image next to the field to
display the Elements List, which will tell you
exactly which supports have been selected.
 |
| |
|
Create a vertical shape. Using the same section, set the anchor point to
Bottom Center and select a support. In the image below the user has
selected three vertical supports.
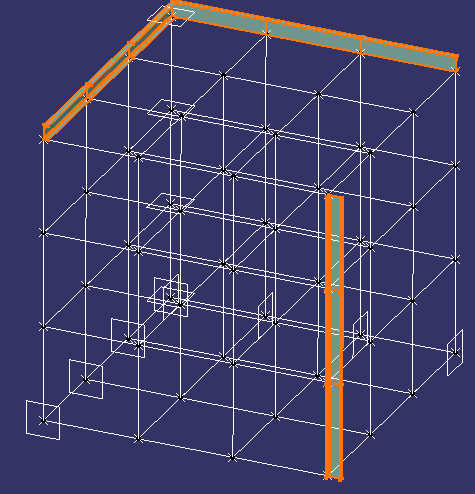 |
 |
|
Do not
forget to check section orientation before clicking OK!
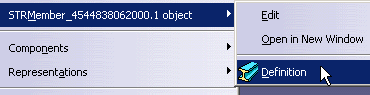
Right-clicking the shape in the specification tree gives you access to the
contextual menu and lets you make any necessary adjustments to the
definition of your shape. |
| |
|
 |
| |
4. |
Click
OK when done. |
|
 |