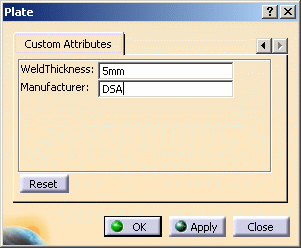
The Plate dialog box is used to explain the process. The procedure is the same when you are creating a shape.


|
|
This task explains how you can modify the value of a custom, or user-added, attribute while you are creating plates or shapes. The same procedure is used when you want to edit a plate or shape. | |
|
|
Attributes are added
to the plate or shape classes using the feature dictionary, which is
explained elsewhere. You can change the value of a user-created
attribute during the creation process. Attributes that were provided
along with this application do not display during this process. You need
to use the standard Edit Properties
command to change the values
of those attributes. The Plate dialog box is used to explain the process. The procedure is the same when you are creating a shape. |
|
|
|
1. | Click the Custom Attributes tab
in the Plate or Shape dialog box. All custom attributes and their values
display. The tab will be blank if no attribute has been added by the
user.
|
| 2. | Change the values in the fields as needed and click Apply or OK when you are ready to create the plate or shape. | |
| 3. | The Reset button can only be used when you are editing an existing plate or shape. Clicking the Reset button restores all values to the original values of the plate or shape - meaning values that existed before you began the editing process. | |
| 4. | To edit an object, right click on
it, select the object in the drop down menu, and then select
Definition. The relevant dialog box displays (e.g. Plate
if you are editing a plate). Make your changes and click Apply
or OK.
|
|
![]()