This task shows you how to create a section plane on the minimum distance.
-
Select Distance.1 (i.e. the minimum distance you measured in the previous tasks) in the geometry area.
-
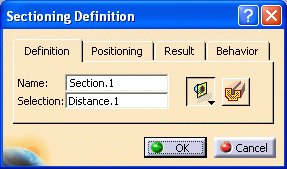
Click Sectioning
 in the DMU Space Analysis toolbar. The section plane is
created on the minimum distance. The Sectioning Definition
dialog box appears
in the DMU Space Analysis toolbar. The section plane is
created on the minimum distance. The Sectioning Definition
dialog box appears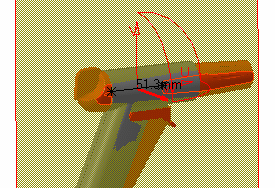
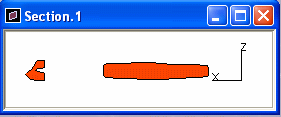
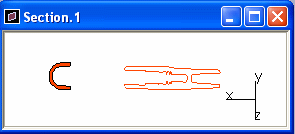
The Section viewer, showing the generated section, is automatically tiled vertically alongside the document window. The section view is a filled view
-
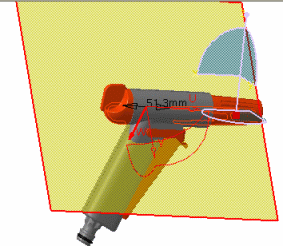
Click the Positioning tab, then Edit Position and Dimensions
 to change parameters defining the current plane position. The Edit
Position and Dimensions dialog box appears. The U-axis of the
section plane is positioned along the minimum distance.
to change parameters defining the current plane position. The Edit
Position and Dimensions dialog box appears. The U-axis of the
section plane is positioned along the minimum distance.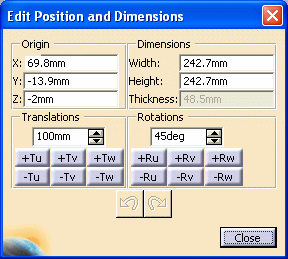
-
Click the +Ru and -Ru buttons (Rotations box) to rotate the plane around the minimum distance.
-
Click Close in the Edit Position and Dimensions dialog box when done.
-
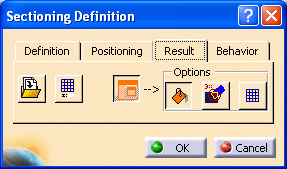
Click the Result tab in the Sectioning Definition dialog box to access commands specific to the Section Results window.
-
Select Grid
 to display a 2D grid.
-
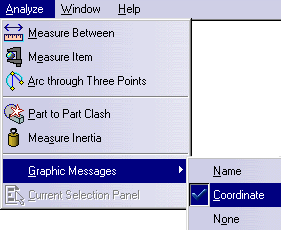
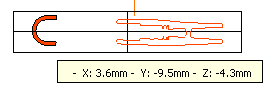
Select Analyze > Graphic Messages > Coordinate from the menu bar to activate the coordinates option.
-
Move the mouse over the geometry in the results window to display the coordinates of the point selected.
-
Deselect the coordinates option.
-
In the Definition tab, click Volume Cut
 to
obtain a 3D section cut. The material in the negative direction along the
normal vector of the plane (W-axis) is cut away. The cavity within the
product is exposed:
to
obtain a 3D section cut. The material in the negative direction along the
normal vector of the plane (W-axis) is cut away. The cavity within the
product is exposed: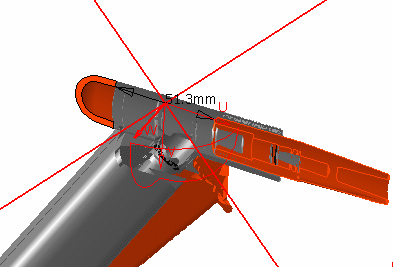
-
Re-click Volume Cut to restore the representation.
-
Click OK in the Sectioning Definition dialog box when done.
![]()