These points can be grouped in a polyline or a join to be used as limit line or
engagement points in machining operations.
Those wizards can be found in the Geometry management tool bar.
|
|
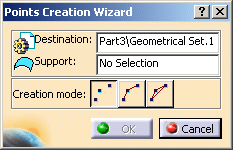
Creating points
-
Click Points Creation Wizard
 .
The dialog box is displayed:
.
The dialog box is displayed:
-
Then select you creation mode. You can create:
-
points with the
 icon,
icon, -
points linked to a polyline with
 icon,
icon, -
points linked to a closed polyline with
 icon
icon
You can switch to another mode during the creation of the points.
The new creation mode is taken into account at the next click. -
-
Select the Destination, that is the mechanical part or the Geometrical set
where you want to store the points. -
Select the Support, that is the surface or the plane on which you want to create the points.
-
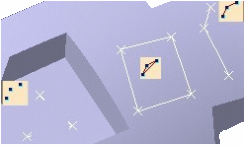
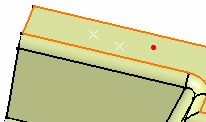
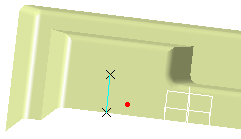
A red dot appears on the Support.
Click to create the point at the required place and repeat that step as many times as necessary.
Click OK to validate the creation.
The points are created in the Destination.
They can be edited in the Wireframe and Surface Design workbench.
![]()
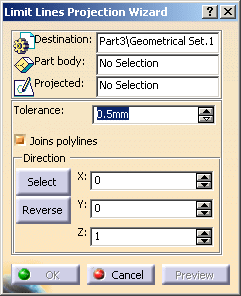
Creating limit lines by projecting a sketch or a polyline
-
Click Limit Lines Projection Wizard
 .
The dialog box is displayed:
.
The dialog box is displayed:
-
Select the Destination, that is the mechanical part or the Geometrical set
where you want to store the lines.
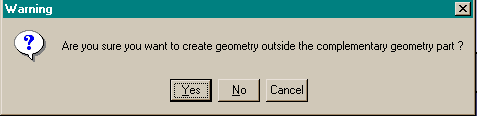
If a complementary geometry part exists, it will be automatically proposed.
If you select another body, a message will ask you to confirm that selection:
-
Select the Part body on which you are going to project the sketch of the polyline.
-
Select the Sketch or the polyline you want to project.
If necessary,
-
Type a Tolerance for the projection computation.
-
Enter a projection direction:
- either by its coordinates,
- or with the Select button: select a line to take its orientation, or a plane to take its normal,
- use reverse in reverse a given direction.
The direction is displayed as a red arrow.
-
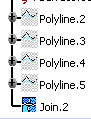
If the check box Joins polylines is selected, the polylines are put in a join.
-
Click Preview to preview the result, and OK to validate.

-
The polylines are created in the selected Geometrical set.
If a join has been created, the polylines are sent to the NoShow while the Join only is visible.
![]()
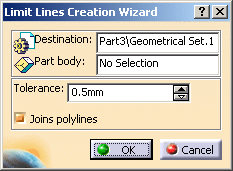
Creating limit lines by picking points
-
Click Limit Lines Creation Wizard
 .
The dialog box is displayed:
.
The dialog box is displayed:
-
Select the Destination, that is the mechanical part or the Geometrical set
where you want to store the points. -
If a complementary geometry part exists, it will be automatically proposed.
If you select another body, a message will ask you to confirm that selection:
-
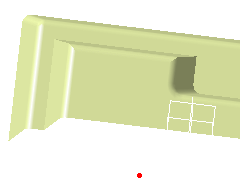
Select the Part body on which you are going to create the line:
The lines are created from the projection of the picking positions onto the support body
along the normal to the screen.
If you pick a point outside the support body, the projected polyline starts at the intersection
between the support and the line between the first and the second pick:
-
Pick the first position again to close the line and start another.
-
Type a Tolerance for the projection computation.
-
If the check box Joins polylines is selected, the polylines are put in a join.
-
Click OK to validate the creation.
The polylines are created in the selected Geometrical set.
If a join has been created, the polylines are sent to the NoShow while the Join only is visible.
![]()