This task shows how to create rolled walls (such as pipes, open pipes with flange, etc.).
![]()
The part is available in the Rolledwall1.CATPart from the samples directory.
![]()
-
Click Rolled Walls
 .
. -
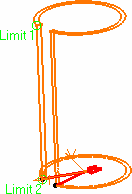
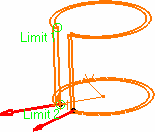
Select the circular sketch.
-
Make sure the type is set to Dimension.
-
Length 1 and Length 2 indicate the location of Limit 1 and Limit 2.

-
Define the options as needed.
- Check the option Mirrored extent to extend the material on both sides of the sketch. In that case, only Length1 can be edited.

- Check Symmetrical thickness to create thickness inside and outside the sketch.
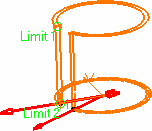
- Click Invert Material Side to invert the direction of the creation of the material.
-
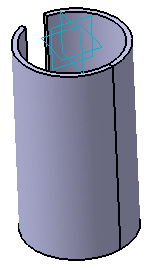
Click OK in the dialog box to create the rolled wall.
Unfolding Reference
To do so, click Fold/Unfold
To select the unfold references:
-
Double-click the Rolled Wall.1 in the specification tree to open the Rolled Wall Definition dialog box.
-
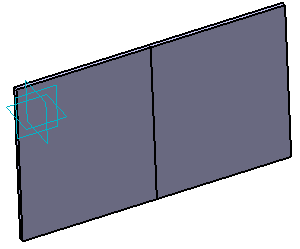
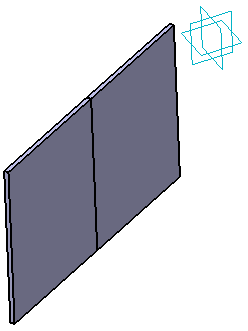
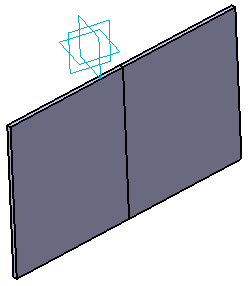
In the Unfold Reference section, select the point of reference from which you want to unfold the rolled wall.
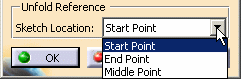
-
Click OK to apply your parameters.
- Start point
- End point
- Middle point

The rolled wall is a particular extrusion, indeed the input sketch is either a circular arc or a closed circle. The sketch may be open. In that case, you can define where the opening should be.
The opening angle must be at least 0.5 degree.The sketch may be closed. In that case, you have no control on the opening location.

The only operations you can combine with a rolled wall in a Sheet Metal model are flanges and cutouts. No other elements (standard wall, bend,...) are allowed.
![]()