|
|
This task explains usage of the planning break manager. | |
|
|
The planning break manager lets you designate how planning breaks and functional volumes should be applied to new objects, or modified objects, in your design. | |
|
|
1. | Click the
entry Planning Break Manager in the specifications tree
|
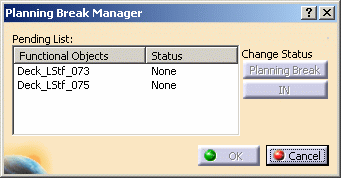
| 2. | The Pending List displays the objects you have added to your document. If you added no new objects then the field will be blank. Select one of the objects, in this case stiffeners. The Change Status buttons become available and the stiffener is highlighted in the viewer. | |
| 3. | To apply the planning break to the stiffener click the Planning Break button. The Status of the stiffener will change to Planning Break. | |
| 4. | To include the
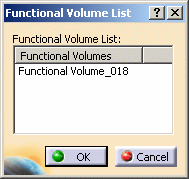
stiffener in an existing functional volume click the IN button.
The Functional Volume List dialog box displays. Select a
functional volume (in the example below there is only one) and click OK.
The Status of the stiffener will change to IN, in the
Planning Break Manager dialog box.
|
|
| 5. | Click OK again in the Planning Break Manager dialog box. | |
![]()