You can create a plate, define its limits and then create several other plates. All plates so created will have the same limits as the first plate.
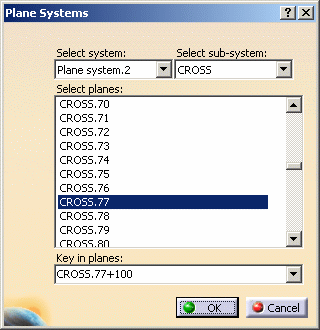
Select the Support field of the Plate dialog box and right click on it. A drop down menu displays - click on Select Reference Planes. The Plane Systems dialog box displays. Select the planes/crosses (Ctrl - click) to define the locations of additional plates. Click OK to place the plates.
You can also enter the plane names in the Key in Planes field.

In the image above the user has keyed in CROSS.77+100. +100 is the offset. This value will display in the Offset field of the Plate dialog box after you click OK.

See Using Reference Plane Browser for more information.