This first task shows you how to enter the Generative Shape Design workbench and open a wireframe design part.
-
Select Shape -> Generative Shape Design from the Start menu.
The Generative Shape Design workbench is displayed. 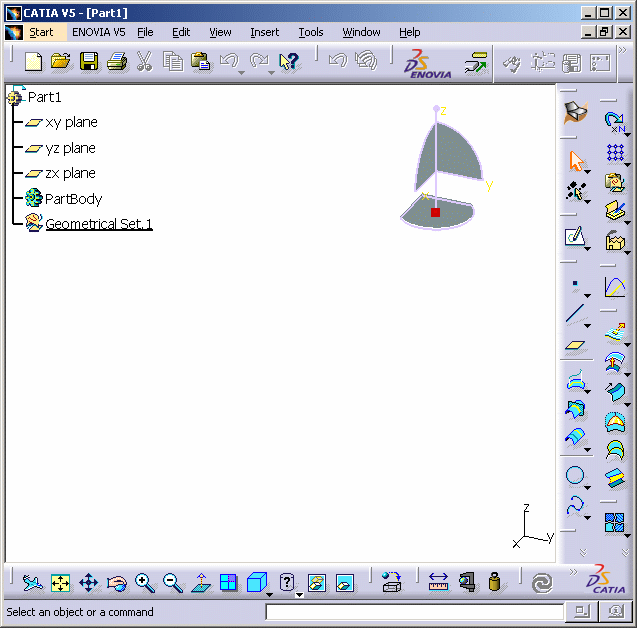
The New Part name dialog box may appear depending on the way you customized your session. It provides a field for entering the name you wish to assign to the part, an option that enables hybrid design an two other options to insert a geometrical set and/or an ordered geometrical set in the part to be created.
If you select Enable hybrid design, the capability then applies to all the bodies you will create in your CATIA session (and not only to the new CATPart document you are opening). Consequently, if your session contains CATPart documents already including traditional bodies, the new bodies you will create subsequently in these documents will possibly include wireframe and surface elements.
To facilitate your design, It is therefore recommended that you do not change this setting during your session.
For more information, refer to the Part Document chapter in Customizing section of the Part Design documentation.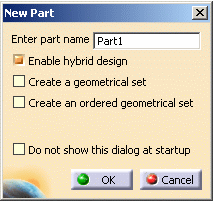
-
Select File -> Open from the menu bar and navigate to the samples directory.
-
Select the GettingStartedShapeDesign.CATPart document.
A wireframe design part is displayed: 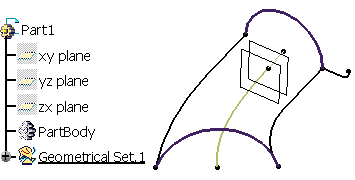

- You can add the Generative Shape Design
For more information, refer to the Infrastructure User's Guide. - If you wish to use the whole screen space for the geometry, remove the specification tree by selecting the View -> Specifications command or pressing F3.
- You can add the Generative Shape Design
![]()