 |
-
Click Shell
 . .
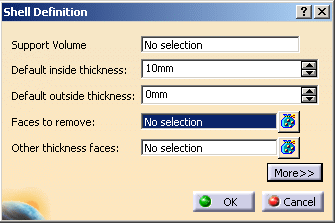
| The Shell Definition dialog box is displayed. |
 |
-
Select the Face to remove.
| The Support Volume field is filled with the volume
owning the selected face. |
") |
-
Enter 15mm in the Default inside thickness
field.
-
Click OK.
| The feature is shelled: the selected face is left open. |
") |
| This element (identified as Shell.xxx) is added to the
specification tree. |
-
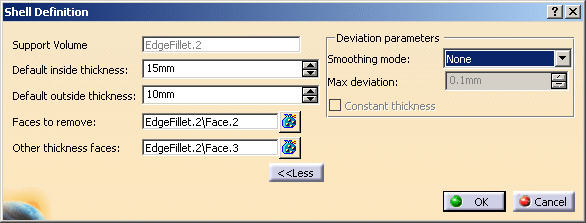
Double-click the shell to edit it.
-
Click the Other thickness faces field.
-
Select a face.
-
Double-click the thickness value displayed on this face.
-
In the dialog box that appears, enter 10mm and click
OK.
| The length between the selected face and the shell is
now 10mm. |
") |
-
Click More>>.
-
 |
|
-
Click OK.
|
|
For further information about
shells, please refer to Creating Shells in Part Design
documentation. |
|