This task shows you how to create a corner between two curves or between a point and a curve.
Open the Corner1.CATPart document.
Corner On Support
-
Click Corner
 .
.The Corner Definition dialog box opens. 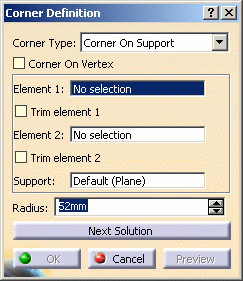
-
Select Corner On Support from the Corner Type drop-down list.
-
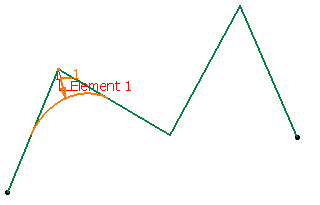
Select a curve or a point as first reference element.
-
Select a curve as second reference element.
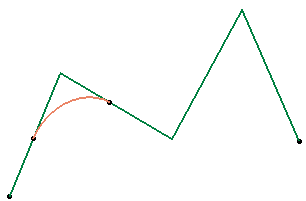
The corner will be created between these two references. -
Select the Support surface.
The support can be a surface or a plane. Here we selected the zx plane. The resulting corner is a curve seen as an arc of circle lying on a support place or surface. 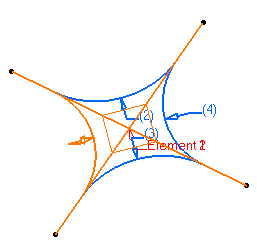

The reference elements must totally or partially lie on this support, as well as the center of the circle defining the corner. Moreover, the laid elements must be connex. -
Enter a Radius value.
In the case of a curve as Element 1, note that:
-
all corners have the same radius
-
closed wires can be selected
-
-
Click OK to create the corner.
The corner (identified as Corner.xxx) is added to the specification tree.
3D Corner
-
Click Corner
.The Corner Definition dialog box opens. 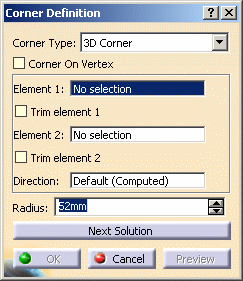
-
Select 3D Corner from the Corner Type drop-down list.
-
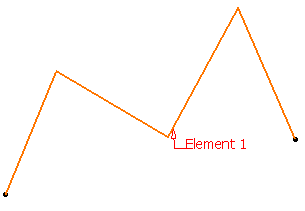
Select a 3D curve or a point as first reference element.
-
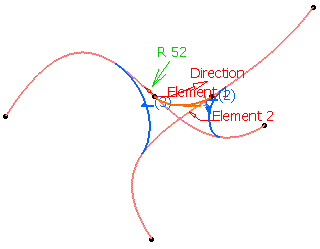
Select a 3D curve as second reference element.
The corner will be created between these two references. -
Select an optional Direction.
-
Enter a Radius value.
In the case of a curve as Element 1, note that:
-
all corners have the same radius
-
closed wires can be selected
-
-
Click OK to create the corner.
The corner (identified as Corner.xxx) is added to the specification tree.
Creating a Corner on a Vertex
Trimming Elements
Elements can be trimmed and assembled individually.
|
|
Several solutions
may be possible, so click Next Solution to move to another
corner solution, or directly select the corner you want in the
geometry.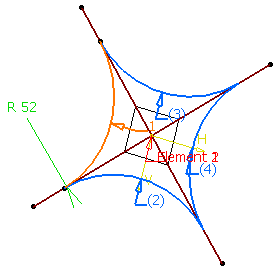 Not all four solutions are always available, depending on the support configuration (if the center of one of the corners does not lie on the support for example). 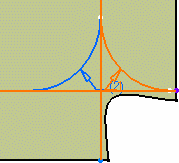 |
|
|
|
![]()