A PowerCopy is a set of features (geometric elements, formulas, constraints and so forth) that are grouped in order to be used in a different context, and presenting the ability to be completely redefined when pasted.
This PowerCopy captures the design intent and know-how of the designer thus enabling greater reusability and efficiency.
-
Select Insert >Knowledge Templates > Power Copy... .
The Powercopy Definition dialog box is displayed.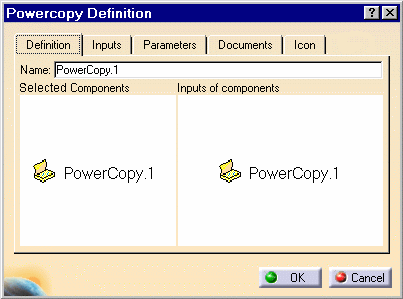
-
Select the elements making up the PowerCopy from the specification tree. For the purposes of our scenario, select Part Body.
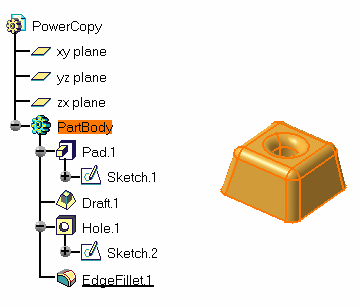
The dialog box is automatically filled with information about the selected elements.
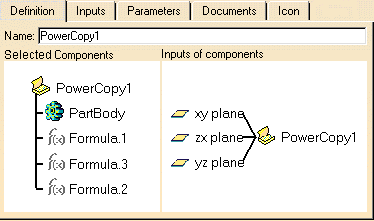
-
Define the PowerCopy as you wish to create it:
The Definition tab lets you assign a name to the powercopy and presents its components in the 3D viewer. For example, enter Test in the Name: field.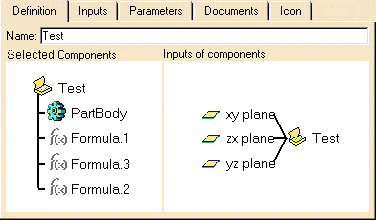
-
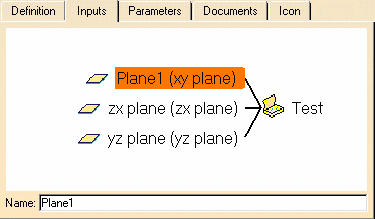
The Inputs tab lets you define the reference elements making up the PowerCopy. You can rename these elements for a clearer definition by selecting them in the viewer and entering a new name in the Name field. In parentheses you still can read the elements' default name based on its type. For example, select xy plane and rename it as "Plane1".
The Parameters tab lets you define which of the parameter values used in the PowerCopy you will be able to modify at instantiation time. This can be a value, or a formula for example.
-
Simply select the parameters and check the Published Name button. In case of a formula, you can set it to false or true. For example, select PartBody/Hole.1/Diameter.
Use the Name field to give a more explicit name to this element. For example, enter Hole.1.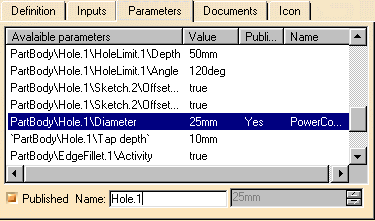
The Documents tab shows the complete path and role of Design tables that are referenced by an element included in the Power Copy.
-
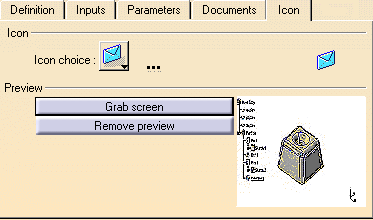
The Icon tab lets you modify the icon identifying the PowerCopy in the specifications tree. A subset of icons is available from the Icon choice button. If you click ... the Icon Browser opens, showing all icons loaded on your application session. Click
 .
.
-
The Grab screen button lets you capture an image of the PowerCopy to be stored with its definition. Click the Grab screen button. You can zoom in or out the image to adjust it.
-
Click the Remove preview button if you do not need this image.
-
Click OK to create the PowerCopy.
The PowerCopy is displayed close to the top of the specification tree.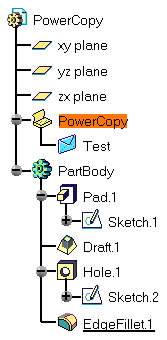
-
Double-click Test in the specification tree to display the PowerCopy Definition dialog box and edit its contents.
-
A formula is automatically included in a Power Copy definition when all its parameters are included.
Otherwise, i.e. if at least one parameter is not selected as part of the Power Copy, you have to manually select the formula to make it part of the definition. If you do so, all the formula's parameters that have not been explicitly selected, are considered as inputs of the Power Copy.
-
Measures and user features cannot be used as elements making up powercopies.
A Few Recommendations
- As far as possible, minimize the number of elements making up the Powercopy.
- Once your power copy is created, do not delete the referenced elements used to make up the PowerCopy.
- Avoid access to sketch sub-elements.
Sketches
- Before creating your powercopies, make sure that your sketch is not over-constrained.
- It is preferable not to use projections nor intersections in your sketch if you want to use your sketch in a Powercopy.
- Avoid constraints defined with respect to reference planes.
If you are using positioned sketches
Generally speaking we recommend the use of positioned sketches instead of sliding sketches.
- If you are using positioned sketches, constrain your geometry with respect to HV absolute axis.
- Avoid constraining elements with respect to external references such as faces, edges, reference or explicit planes.
If you are using sliding sketches
- When defining Powercopies including sliding sketches, use profiles constrained with respect to edges or faces rather than to planes. Additionally, set the Create geometrical constraints option off before sketching.
- Generally speaking, it is always preferable to use profiles both rigid and mobile. Make sure that your sketch is iso-constrained (green color). You can use non-iso-constrained sketches, but it will be more difficult to understand and control the result after instantiation.
- Avoid constraining your 2D elements with respect to HV absolute axis. The result you obtain after instanciating the powercopy could be unstable. Actually, you cannot control the position of the origin of the absolute axis nor its orientation.
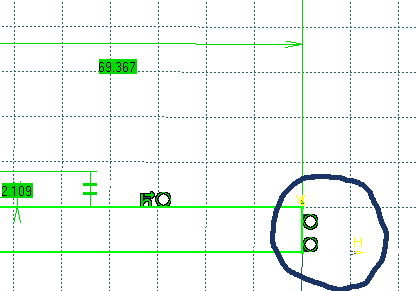
- Constrain elements with respect to external references such as faces, edges, reference or explicit planes:
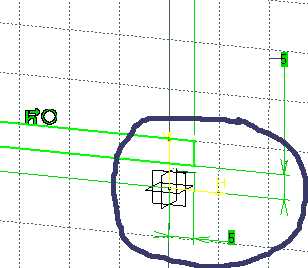
Knowledgeware
- Formulas are automatically included if you select all the parameters.
- For complex design, integrate knowledge rules.
Managing inputs
- Always rename your inputs to help the end user to understand what he needs to select.
- A formula is automatically included in a Power Copy definition when all its parameters are included. Otherwise, i.e. if at least one parameter is not selected as part of the Power Copy, you have to manually select the formula to make part of the definition. If you do so, all the formula parameters that have not been explicitly selected are considered as inputs of the Power Copy.
- Note that when including parameters sets containing hidden parameters in a PowerCopy, the hidden parameters are automatically instantiated when instantiating the PowerCopy.
- Do not use holes on non-planar surfaces as input data: it is not possible to instantiate thes element types.
Preview
- In a CATPart document, create only one PowerCopy reference. It is not a technical restriction, but there are at least two reasons for this: the cost of an instantiation will be smaller in the document is smaller. The end user can more easily understand the feature to be instantiated.
- Put in 'show mode' only the input and the result (to help the end user to understand what he needs to select).
- Use colors to differentiate inputs (put transparency on results for example).
- Choose a pertinent viewpoint before saving the CATPart document reference, default viewpoint in preview during instantiation will be the same.
Hybrid Design
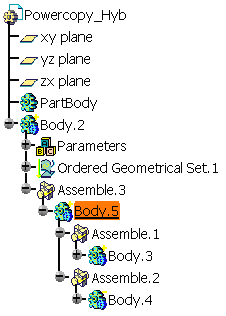
In hybrid design environments, bodies that underwent Boolean operations are located below the nodes corresponding to these operations. Consequently, they cannot be selected to define a powercopy. If, for example, you try to select Body.5 as an input element making up a powercopy, a warning message displays warning you that because Body.5 is aggregated into Assemble.3, you cannot select it as an input component.
 |