|
|
This task shows you how to
insert a pocketing operation in the program. As this operation will use the default tool and options proposed by the program, you just need to specify the geometry to be machined. |
||
|
|
1. | Select Pocketing
A Pocketing.1 entity along with a default tool is added to the program. |
 |
| The Pocketing dialog box appears directly at
the Geometry tab page
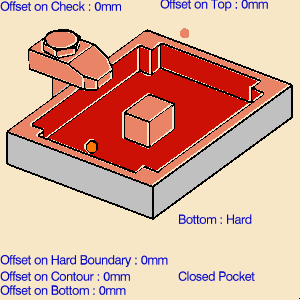
The red status light on the tab indicates that you must select the pocket geometry in order to create the operation. The Geometry page includes an icon representing a simple pocket. There are several sensitive areas and texts in the icon to help you specify the pocket geometry. Sensitive areas that are colored red indicate required geometry. Make sure that the Pocketing style is set to Closed Pocket. Click on the Open Pocket text if this is not the case. |
|
||
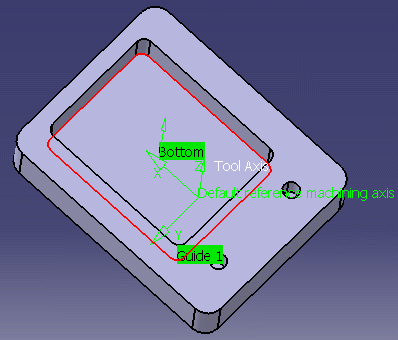
| 2. | Right-click the red Bottom in the icon and
select Contour Detection.
Click the red Bottom area. The dialog box is reduced allowing you to select the corresponding part geometry. |
||
| 3. | Select the bottom of the pocket.
The boundary of the selected pocket bottom is automatically proposed as guiding element for the operation thanks to the Contour Detection setting The dialog box reappears. The bottom and sides of the pocket in the icon are now colored green,
indicating that the corresponding geometry is defined for the operation.
The tab status is now green
|
 |
|
| 4. | Click OK to create the operation. | ||
|
|
|||