1.
When there is only one part type it will be preselected. If the Part Type field is grayed out, click again on the location where you want to place the part.
|
|
This task shows you how to place a part - in this example a gate valve - on a run. | |
|
|
The part placement procedure described below is a simplified version of the process. There is much more to placing parts. This process is described more fully in Placing Parts. | |
|
|
1. |
With the run displayed, click the Place
Piping Part button |
| 2. | Click at the location where you want to place the part - you must do this before displaying the Class Browser, which is the next step. | |
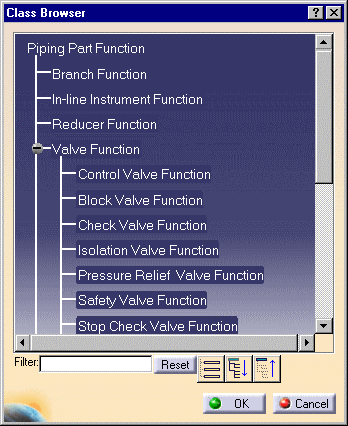
| 3. | Click the Class Browser button
(next to the Function Type field) to display the Class Browser. Double
click on Piping Part Function to expand the list and click the + sign at
Valve Function to expand the list of valve types.
|
|
| 4. | Select Control Valve Function. The function will display in the Place Piping Part dialog box. | |
| 5. | In the Place Piping Part dialog
box, click on the down arrow in the Part Type field to display a list of
control valves and select the gate valve.
When there is only one part type it will be preselected. If the Part Type field is grayed out, click again on the location where you want to place the part. |
|
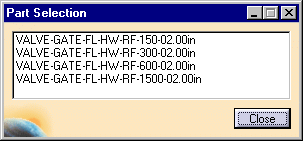
| 6. | If there is more than one part
number for the Part Type you selected the Part Selection box will display.
For this scenario, select from the list of 2 inch gate valves.
|
|
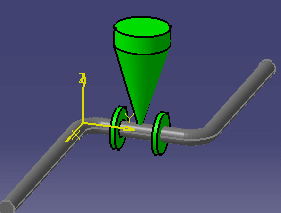
| 7. | The valve is placed.
|
|
![]()