|
|
Licensing |
|||||||||||||
| Stock Analysis
|
||||||||||||||
|
|
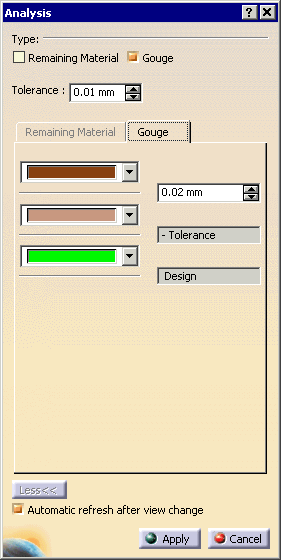
This procedure describes how to compare the machined stock and the target (design) part by using the graphical comparison functionality. |
|||||||||||||
|
|
Areas on the machined stock from which extra material has been removed are reported as gouges. Areas where material has not been removed completely are reported as remaining material. |
|||||||||||||
| This functionality provides a visual comparison achieved
by color-coding the stock according to how close the machined surface is
to the surface of the target (design) part. A series of tolerance bands
and a color for each band is defined. All points on the machined surface
that lie within a particular band are given the corresponding band color.
By defining the tolerance band appropriately, all remaining material
points or gouge points on the machined surface can be identified and
displayed in as many colors.
The magnitude of remaining material or gouge can also be queried at a specified point. This magnitude is the shortest distance between the picked point on the stock and the nearest point on the target (design) part. The coordinates of the picked point on the stock are also displayed along with the magnitude of remaining material or gouge. |
||||||||||||||
|
|
Click Stock Analysis
|
|||||||||||||
|
|
|
|||||||||||||

