- A check is done to avoid overcut situations: if a pass in a side machining path shows an overcut situation, this pass and the passes below are removed. This may occur while using the Center(1) and Side(2) (Machining strategy tab) on areas already partially machined and while using the Pockets only (Machining strategy tab, Machining mode) or the Center zone order (Geometry tab) and Machine only ordered areas (contextual menu of Center zone order). This may lead to unmachined areas.
- A side machining toolpath may be created for the whole part.
- This tool path is limited either by a check element or a limit line.
- Remaining thickness for sides is taken into account only on the part, not on the check.
- The Zlevels of the side machining are linked to the Zlevels of the center machining (not to those of horizontal areas).
- A side machining toolpath that does not cut any material is removed (note that it is kept even if it cuts only a small amount of material).
The Center(1) and Side(2) Machining strategy should be used for
a first roughing only (no rework) and
when the pockets to process are exempt of machining:
when the pockets are already partially machined, the material left may not
be sufficient to create a Center path on some level,
thus preventing the creation of a Side path on the same level.
This may result in collisions or tool breakage while machining lower levels.
Generally speaking, this warning applies to any configuration with areas
to machine on a fine material thickness
(i.e. less than Remaining thickness for sides) on the upper levels and a
larger material thickness
(i.e. greater than Remaining thickness for sides) on lower levels
This warning applies not only to rework but also to the cases where the rough stock matches the configuration above.
A side machining can be guaranteed only if the thickness of the material to remove on any point is higher than the Remaining thickness for sides.
-
Open the MultiPockets1.CATPart from the samples directory.
-
Create the rough stock:
- select the Creates rough stock icon,
- pick the part,
- select PartBody as the Destination.
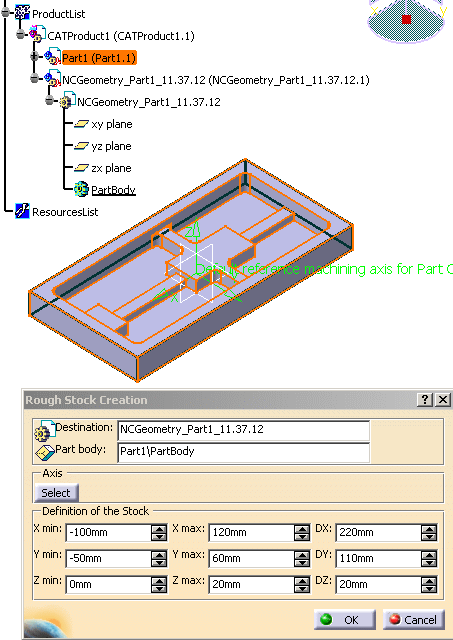
-
In the Multi-Pockets operations toolbar, pick the Power Machining icon

-
Select Machining Program.1 in the specification tree.
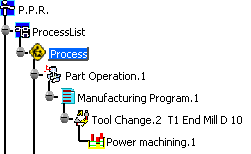
The Power machining dialog box opens.
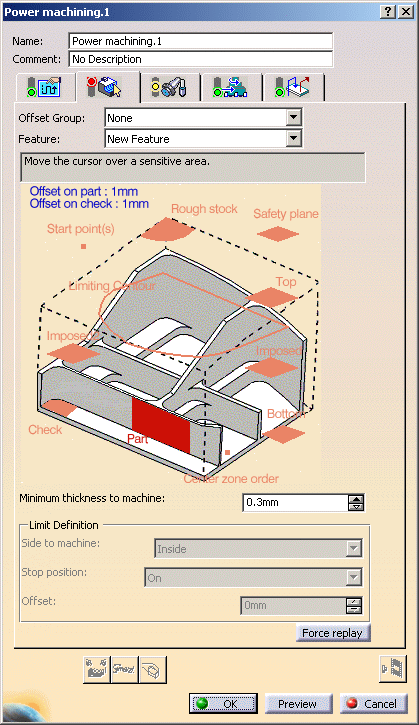
-
Select the Rough stock and the part to machine.
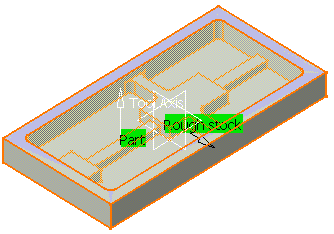
-
Define imposed planes:
-
Click one area Imposed and select a first plane as shown below:
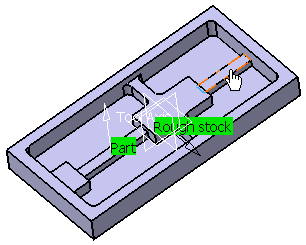
- repeat with the other area Imposed and select a
second plane:
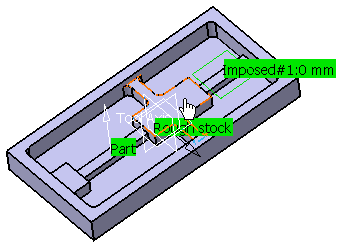
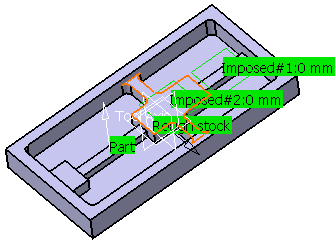
- You see that it is possible to impose two sets of planes.
Using their contextual menu, you can set an offset on each of them.
-
-
Go to the Machining tab and make sure the Machining strategy is set to Center(1) and Side(2).

-
Click Tool path replay. The center and the walls are machined in one shot.

![]()