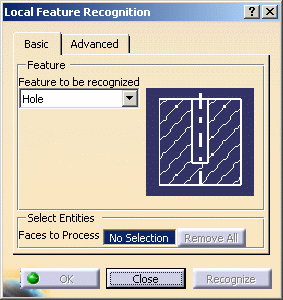
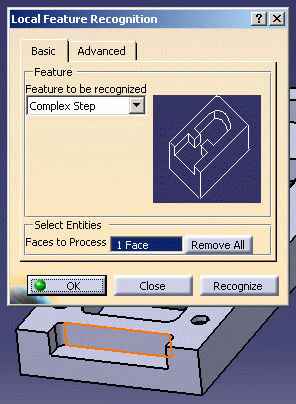
- In previous releases, all the faces of the feature had to be selected to allow the feature to be recognized. Now, a feature can be recognized by selecting either the bottom face or one or more contour faces.
- To deselect a selected face, just reselect it. To deselect all selected faces, just click Remove All.
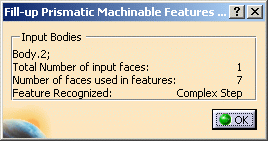
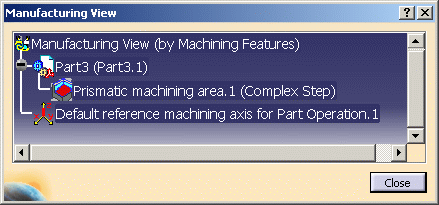
The created feature appears in the Manufacturing View.
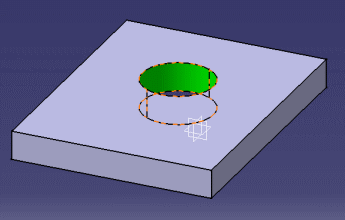
- one of the simple holes, you need to locally select either the bottom or side face
- one of the counterbored holes, you need to locally select either the bottom or side face
- the complex cutout, you need to locally select either the bottom or a flank face
- the complex pocket, you need to locally select either the bottom or a flank face.
The through features are given a machining axis direction parallel to the selected direction.
Unsuccessful Local Feature Recognition
In case of local feature recognition failure, an appropriate error message is issued. Whenever possible, the elements that caused the failure are highlighted. Some examples are given below.
Feature type does not match.
The recognized feature is not of the specified type.
You must select at least one face that uniquely belongs to the
feature.
If you do not select a unique face, feature recognition will fail.
Duplicate feature creation.
When you try to recognize a feature that is already present in the
manufacturing view, no new feature will be created.
Non-machinable feature due to very small dimension.
When machining parameters such as depth are very small so as to make them
non-machinable, such features are not recognized.
Non-machinable feature due to invalid face or edge contour.
Feature creation is not possible because of the machinability checks
applied on face or edge contour during feature creation.
Advanced Parameters
The Advanced tab page of the Local Feature Recognition dialog box contains a number of parameters for specific processing. For more information, please refer to:
Tips for Local Creation of Machinable Features with Feature Recognition
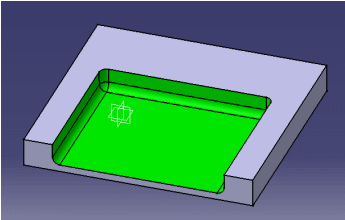
In general, a feature can be recognized by selecting either the bottom face or one or more contour faces.
To recognize a hole, you must select all the faces of the hole that will be machined: flank faces and, in case of a blind hole, the bottom face. Never select the top face.

To recognize a feature with fillets, you must select all the fillets to be able to recognize the feature.
Note that features surrounded by convex fillets are not considered as prismatic features and are not managed by the feature recognition capability.
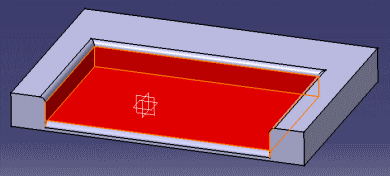
In all cases, selection of non-adjacent faces will not allow feature recognition.
In the image below, selection of all the red faces will not recognize a complex step feature.
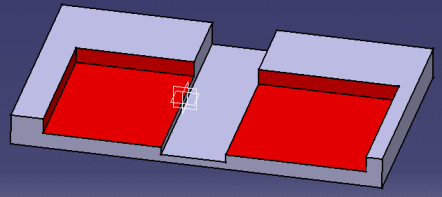
In the case of intersecting holes, feature recognition will
create as many holes as separate surfaces.
In the image below, three features are recognized: one for each surface
color. The blue and yellow surfaces do not generate a single machining
feature.

![]()