 |
This task shows how to check accessibility on
a VNC machine. This involves:
- customizing the machine tool environment
- loading part and opening the desired NC workbench
- using the commands of the Machine
Management toolbar for:
- importing resources
- positioning the part on the machine table
- attaching the part on the machine table
- checking accessibility at the current tool position by means of a
replay.
|
 |
1. |
Select Tools > Options from the
menu bar. Select the Compatibility category in the tree to the left.In
the Root Libraries field of the DELMIA D5 tab page, enter the path of a
library that will allow importing DELMIA Deneb device files (for example,
..\startup\Manufacturing\Samples\NCMachineToollib).
Note that the path name must not contain any blank characters.
Click OK to validate this choice. |
|
2. |
Open the
AccessibilityChecking.CATPart document, then select NC
Manufacturing > Prismatic Machining from the Start menu. |
|
3. |
Select the Resource Context
 to import a
VNC machine. to import a
VNC machine.In the dialog box that appears, select Files of type:
(*.dev) Deneb devices then open the machine 3_2_axis.dev
in the NCMachineToollib\Devices folder.
This machine is added to the Resource List. |
|
4. |
Double-click the Part Operation in the tree, then select Machine
 . .In the
Machine Editor dialog box, click
 then select the Makino_5.1 VNC machine in the tree. Click OK to assign the
machine to the Part Operation.
 |
|
5. |
Click OK in the Part Operation dialog box: the machine is added to the
Resource List. The machine and the part are displayed together in the 3D
window. 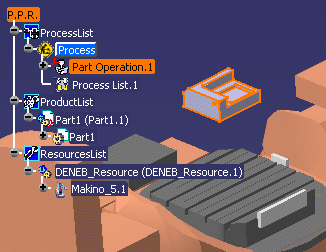
|
|
6. |
Select Snap
 then
position the part on the machine table as follows. then
position the part on the machine table as follows.
- Select the part in the 3D window. A square symbol appears.
|
|
|
- Use the mouse to move the symbol and click when the square is located
on the underside of the part.
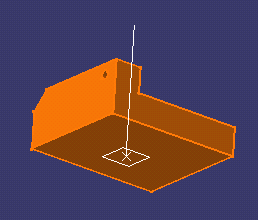
|
| |
|
- An orientation symbol and the Define Reference Plane dialog box
appear. Click OK in the dialog box.
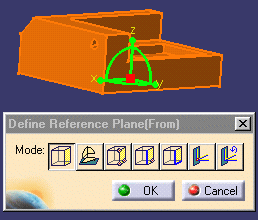
|
|
|
- Select the machine table in the 3D window. A square symbol appears.
|
|
|
- Use the mouse to move the symbol and click when the square is located
on the center of the table.
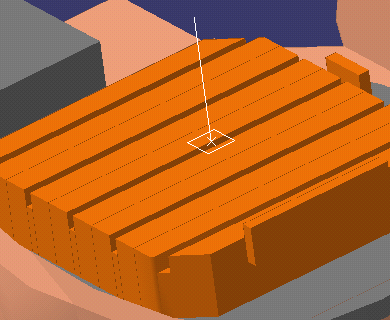
|
| |
|
- An orientation symbol and the Define Reference Plane dialog box
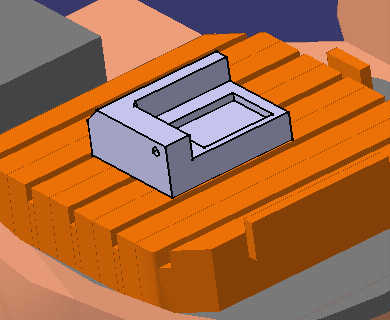
appear. Click OK in the dialog box. The part is then snapped onto the
table.
|
|
|
- Click Select
 to exit the Snap command.
|
|
7. |
Select Attach
 then attach
the part and the machine as follows. then attach
the part and the machine as follows.
- Select the table (parent object) then the part (child object).
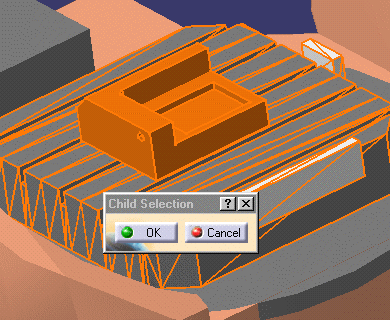
- Click OK in the Child Selection dialog box.
|
 |
|
You can use Fit All In
 to reframe the part in the 3D window.
 |
|
8. |
Create a machining operation (a pocketing operation, for example). |
|
9. |
Activate the Replay dialog box, then click
Check Reachability
 to verify
that the machine can effectively reach the part at the current tool
position. to verify
that the machine can effectively reach the part at the current tool
position.
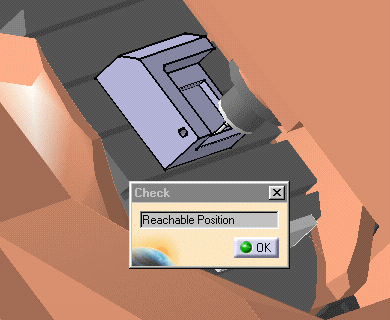
A Check pop-up appears indicating whether the position is reachable:
- If reachable, then the tool, part and machine are displayed at that
position.
- If the position is out of limits or unreachable, then the part and
machine are displayed with the tool at the home position.
|
|
10. |
Click OK in the Check pop-up to return to the replay mode. |
|
 |