-
Select Start > Mechanical Design from the menu bar.
-
Select the 2D Layout for 3D Design workbench.
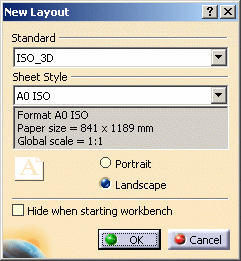
The New Layout dialog box is displayed, allowing you to choose a standard, a sheet style and an orientation for your new layout. Among other things, the sheet style defines the sheet format, paper size, scale and default orientation.

-
Make sure the ISO_3D standard is selected. Leave the other options with their default values.
-
Click OK.
The New Part dialog box is displayed. -
Enter a name for the part that will be associated to your layout (Disk, for example), and click OK.
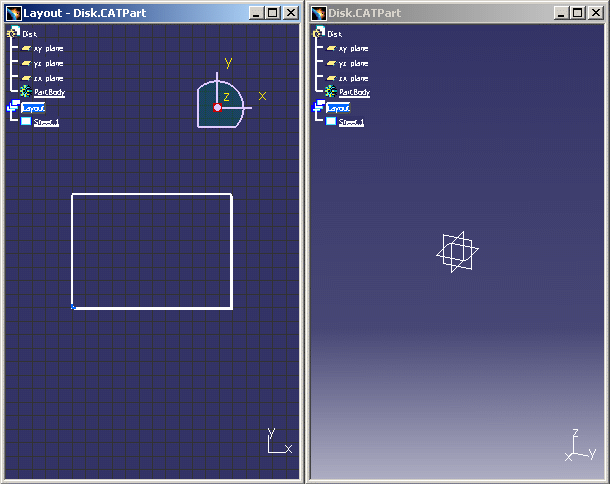
An empty sheet is created in a specific 2D window, and the associated part document is created and opened in a 3D window.

![]()