Prior to performing this scenario, you should be familiar with revolute joint creation in beginner's mode
Automatic switch to Design mode:
If you work with the cache system in visualization mode, you no longer
need to use Edit > Representations >Design Mode beforehand as
the switch to design mode is automatic (an eye appears as you point the
product in the geometry or specification tree). All you need to do is click
on the object.
-
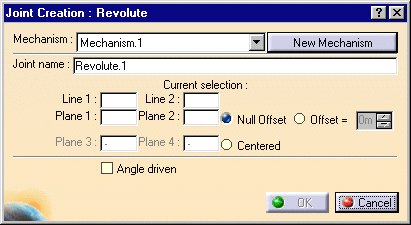
Click Revolute Joint
 in the Kinematics joints toolbar or select Insert > New
Joint > Revolute from the Menu bar. The Joint Creation:
Revolute dialog box appears.
in the Kinematics joints toolbar or select Insert > New
Joint > Revolute from the Menu bar. The Joint Creation:
Revolute dialog box appears. -
Click New Mechanism. The Mechanism Creation dialog box is displayed:
-
Enter the name of your choice for the mechanism.
-
Click Ok when done
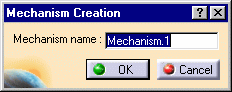
In our example, keep the default name Mechanism.1.
The Mechanism is identified in the specification tree 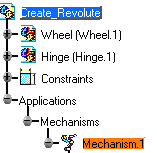
-
-
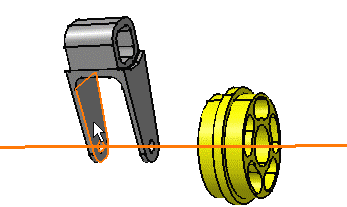
Select the lines in the geometry area:
-
Line 1 = hinge axis
-
Line 2 = wheel axis
-
-
Select the planes in the geometry area:
-
Plane 1 = left inner hinge plane
-
Plane 2 = left wheel axis surface

The plane you select must be perpendicular to the hole axis previously selected For more information, refer to the "Conditions between selections" table for Revolute joints in About Joints

-
-
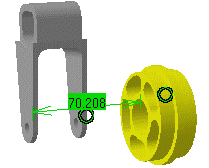
Select the Offset option button.
Select the offset value for this, three methods are available:-
enter the required value in the offset field
-
use the scrollbar
-
right-click the field and select the measure item from the contextual menu displayed
In our example keep the default value.

If you perform a right-click in the offset value field, a contextual menu lets you select between two items: measure or change step
Select the measure item: the Measure Between dialog box and Measure Tools toolbar appear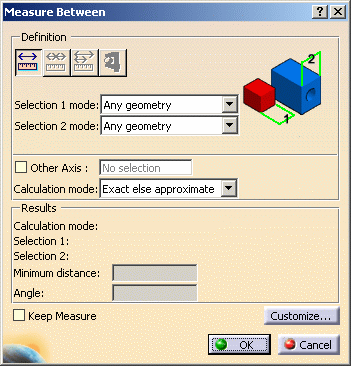
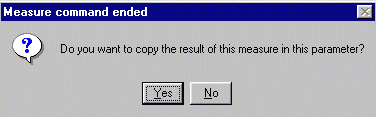
Select two entities. Keep this measure as offset value. A warning message lets you copy the measure you defined.
You can also change the step using Change step > new one
For more information, see Specifying a Parameter Value as a Measure in the Knowledge Advisor User's Guide and Measuring Minimum Distances & Angles between Geometrical Entities and Points in the Space Analysis User's Guide
-
-
Assign the Angle driven command if needed.
-
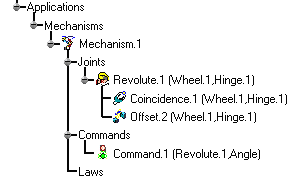
Click Ok to end the Revolute Joint creation.
The specification tree is updated.
Open the Create_Revolute_Offset.CATProduct to check your result.
![]()