This task explains how to ask for the Zone editor on an ENOVIA V5 VPM Product.
-
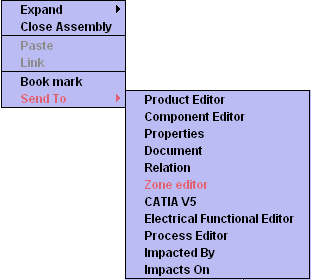
In ENOVIA V5 VPM Product Editor, right-click a Product and select Send To > Zone editor.
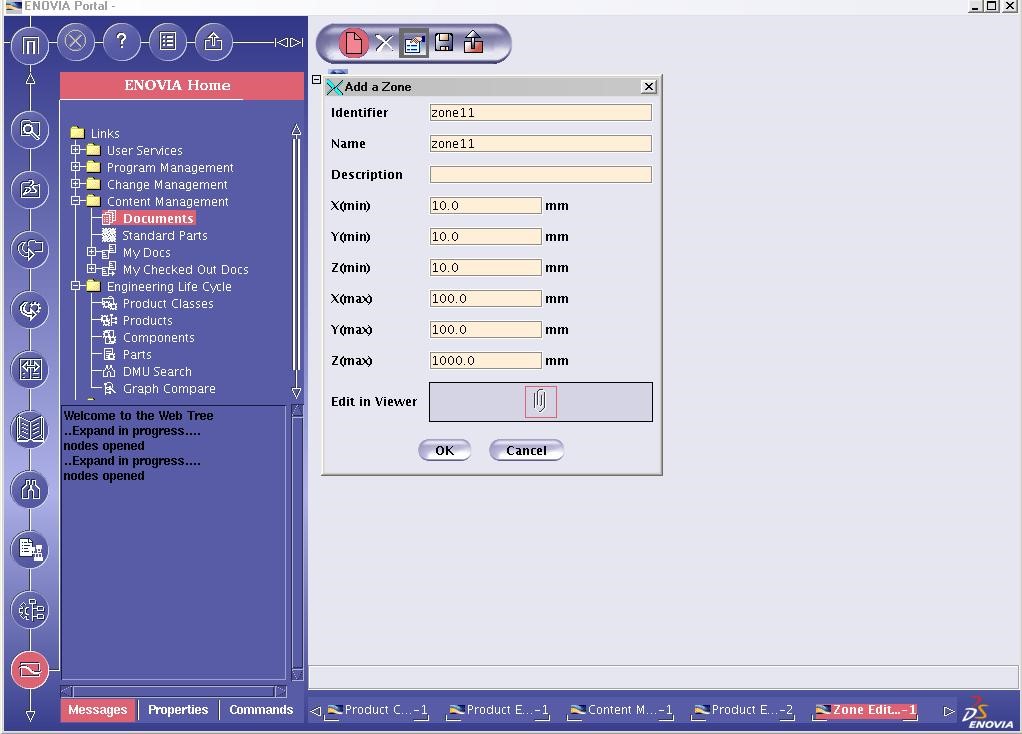
The zone editor window appears displaying the zone editor commands:

The New zone
 icon enables to add a
new zone under the selected zone in the zone hierarchy,
icon enables to add a
new zone under the selected zone in the zone hierarchy,
The Cut icon enables
to cut the selected zone,
icon enables
to cut the selected zone,
The Edit zone enables to modify the zone
definition,
enables to modify the zone
definition,
The Save icon
enables to commit modifications.
icon
enables to commit modifications.
![]()
How to modify a zone
This task explains how to define or modify the geometric definition of a zone using a CATIA V4 interactive command.
-
Select a zone.
-
Select Edit zone
. The Zone
Modification dialog box is displayed.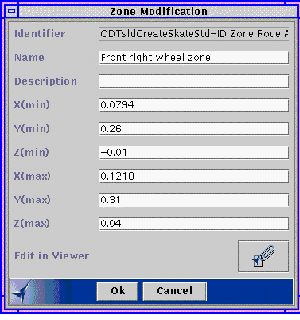
-
Select Edit in viewer
 to visualize the zone in
CATIA V4.
to visualize the zone in
CATIA V4. -
Use CATIA V4 to define the zone.
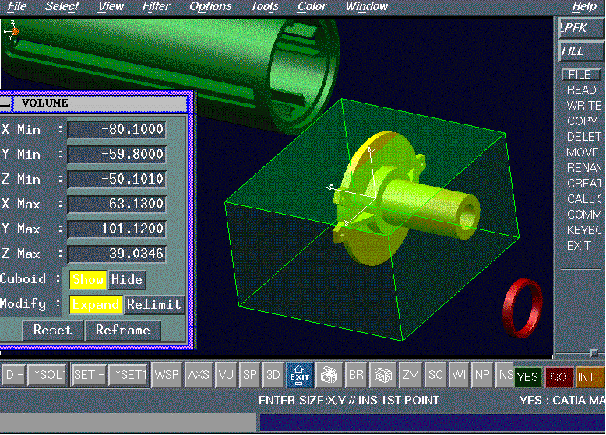 /b>
/b>The Hide button enables to modify the graphical appearance of the zone (to be able to select an object inside the zone for example),
In the Modify field, specify the type of modification: Expand to include a selected object or Relimit to expand or re-limit in selected directions,
The Reset button enables to clear initial values,
The Reframe button enables to reframe CATIA view on a defined zone. -
Click YES to validate the current zone definition. The values are carried in the Zone Modification window.
![]()