-
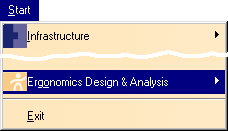
Go to the Start menu (see below).

-
From the Start menu, select
Ergonomics Design & Analysis > Human Builder to
create a new manikin.
-
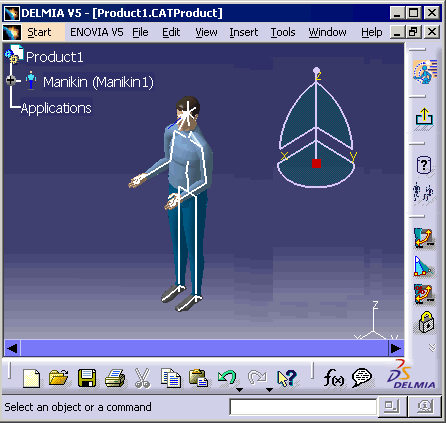
The workbench appears.
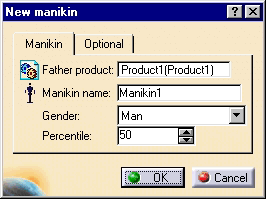
Select the inserts a new manikin

-
Under the Manikin tab,
select the father product, select the Product1 in the 3D geometry
window. Select the defaults or enter a name for the manikin, set the
gender, and the percentile.
-
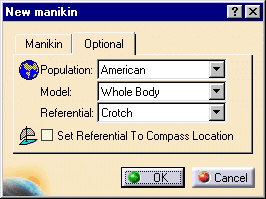
Under the Optional tab, set
the population, model-type, referential, and choose whether or not to
set the referential to a compass location.
-
Select the
required icon from the Manikin Workbench Access toolbar from the Human
Builder workbench.

-
Select the Opens the Human Posture
Analysis workbench
 and the command prompt asks you for Select a segment or a line of
sight..., select the required segment.
and the command prompt asks you for Select a segment or a line of
sight..., select the required segment.
-
The software changes to the
Human Posture Analysis workbench.
-
Or if you already have an
active product containing a manikin, select the manikin or double-click
a segment to change to the workbench.