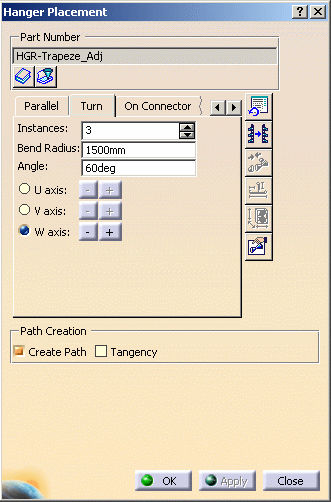
In the Bend Radius field, enter a length.
In the Angle field, enter the desired angle. Select a hanger.
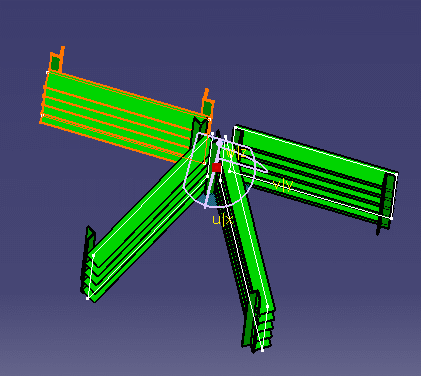
The image below results when you enter 3 Instances, 1500mm as the Bend Radius, and 60 degrees as the Angle.
|
|
This task shows you how to place a hanger at an angle to another hanger. | |
|
|
1. | With your document open, click the
Place Hanger button
|
| 2. | In the Instances field,
click the up or down arrow to select a value of 1 or more. You can also
enter a value. In the Bend Radius field, enter a length. In the Angle field, enter the desired angle. Select a hanger. The image below results when you enter 3 Instances, 1500mm as the Bend Radius, and 60 degrees as the Angle.
|
|
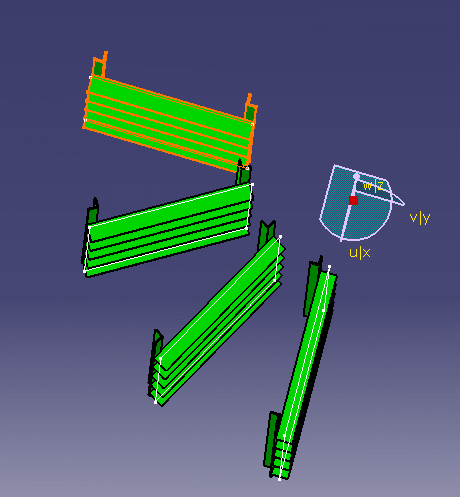
| 3. | The image below is a result of
changing the Bend Radius to 500mm and the Angle to
30 degrees.
|
|
| 4. | You can select the U Axis or V Axis (positive or negative) instead of the W Axis (used in the above examples) to rotate the hanger around the axises. | |
| 5. | Click OK and the hangers are placed at the angles selected. | |
![]()