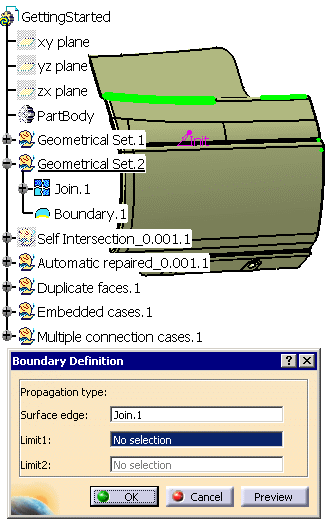
The Boundary Definition action enables us to check whether there is a boundary or not,
i.e. whether the surface is closed or not.
-
Click Boundary
 in the Operations toolbar and select Join.1.

-
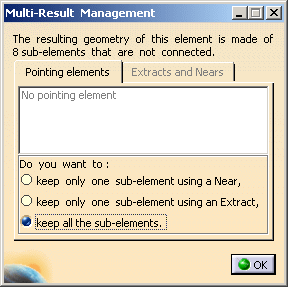
Click OK. A message appears about the Multi-Result Management. Select keep all the sub-elements.
Boundary.1 is created under Geometrical Set.2.

-
This shows that there is a boundary, made of several sub-elements, which means the surface is not closed.
You are going to perform a local join on this boundary:- as you enter the boundary to process, the action searches the
gaps that may exist,
and indicates the size of the largest gap found in the field near Automatic Merging. - This gap is larger than the Merging Distance used in
the Global Join.
Performing a Global Join with the value of this gap would merge elements that you do not want
to merge because this would deform the model. - Performing a Local Join with this value on the
boundary only avoids deforming the model and
ensures the model is closed.
- as you enter the boundary to process, the action searches the
gaps that may exist,
-
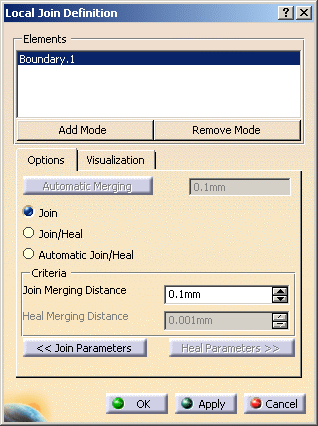
Click Local Join
 in the Repair Topology toolbar and select Boundary.1.

-
The size of the largest gap found is 0.1 mm.
This determines the Join Merging Distance: enter 0.1 mm in the Join Merging Distance box .
Click OK. LocalJoin.1 is created under Geometrical Set.2. -
Click Boundary
 and select the surface again. A message appears.

The surface has no boundary: it is closed.
![]()