-
In the specification tree, using the Define in Work Object contextual command, select the element at which level you want the new geometrical set to be inserted.
This element defines the father location for the insertion of the new geometrical set.
-
Select the Insert > Geometrical Set menu command.
The Insert Geometrical Set dialog box
appears.
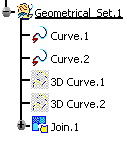
The Features list displays the elements to be
contained in the new geometrical set.
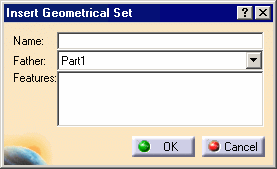
In the Insert Geometrical Set dialog box you can:
-
Name: allows you to name the new geometrical set, otherwise the application names the geometrical set with the following rule: Geometrical_Set.x, incrementing its name in relation to the pre-existing bodies, in the specification tree.
-
Father: allows you to reorder the new geometrical set under another specification tree entity.
-
Features: allows you to add entities to be contained in the new geometrical set by selecting them from the specification tree or the geometry area.
If all selected entities belong to the same geometrical set, the father of the new geometrical set is automatically set to the father of these entities.
-
Click OK to create the geometrical set.
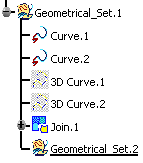
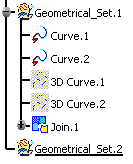
The result is immediate. The geometrical set is created after the object in work and is underlined, indicating that it is the active geometrical set.
-
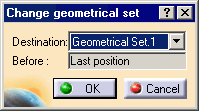
Right-click Geometrical_Set2.object in the specification tree and select Change Geometrical Set... from the contextual menu.
-
Select the Geometrical_Set.1 in the Destination combo list in the specification tree, then click OK in the Change geometrical set dialog box.
The selected geometrical set has been moved last in the initial Geometrical_Set.1 and is still active.