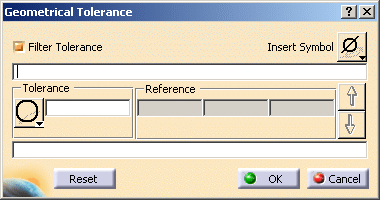
Geometrical tolerances are specifications included in a tolerance frame.
-
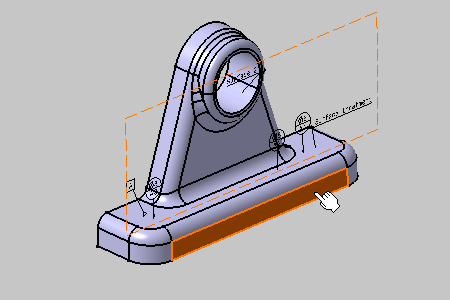
Select the front planar surface as shown:
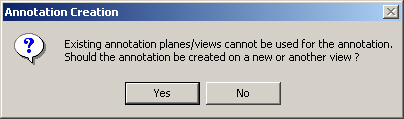
A message window appears informing you that you cannot use the active view. Therefore, the application is going to display the annotation in an annotation plane normal to the selected face.
When fulfilling the second line "Spec 2...", a second geometrical
tolerance will be created.
Both tolerancing specifications will be displayed as grouped.
-
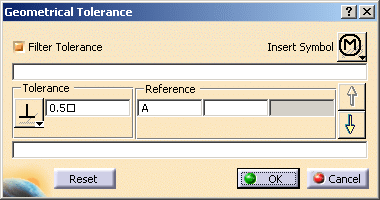
Set the perpendicularity symbol to define the tolerance.
-
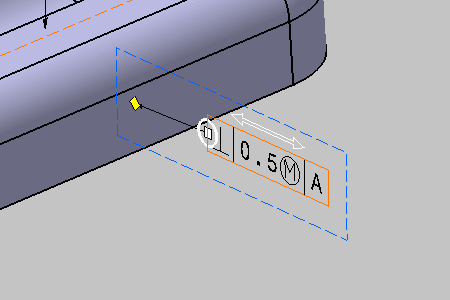
Enter the value of the tolerance: 0.5 and insert the At Maximum Material Condition symbol modifier
-
Enter A as reference.
-
Click OK. The geometrical tolerancing annotation is attached to the 3D part.
The geometrical tolerance entity is added to the specification tree.
You have specified a perpendicularity of the front planar surface regarding to A datum surface.
This toleranced surface shall be in 0.5-wide tolerance zone, on which a Maximum Material Condition (MMC) is applied.