This task will show you how to synchronize the analysis assembly content with the product changes.
At any time, you can add or remove a shape, activate or deactivate an existing shape and add or remove a product component in a analysis assembly context. The content of the analysis assembly is not automatically synchronize.
Only available with the Generative Assembly Structural Analysis (GAS) product.
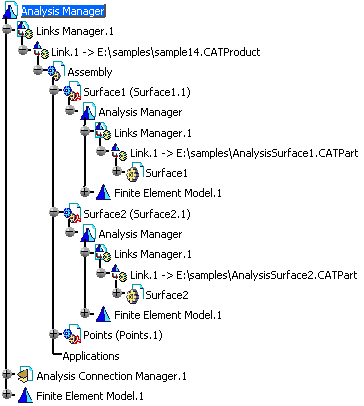
Open the sample14.CATAnalysis from the samples directory.
-
Click Analysis Assembly 2D Viewer
 in the Analysis Assembly toolbar.
 -
Click Cancel in the Assembled Analysis Definition dialog box.
-
Change the shape associated to a sub-analysis.
In this particular example:
-
Double-click Assembly in the specification tree.
-
Right-click the Surface.1 part and select the Representations > Manage Representations... contextual menu.
-
Select AnalysisSurface11.CATAnalysis in the Manage Representations dialog box and click the Deactivate button.
-
Select ASurface12.CATAnalysis in the Manage Representations dialog box and click the Activate button.
-
Click Close in the Manage Representations dialog box.
-
-
Double-click Analysis Manager in the specification tree to retrieve the analysis context.
-
Click Analysis Assembly 2D Viewer
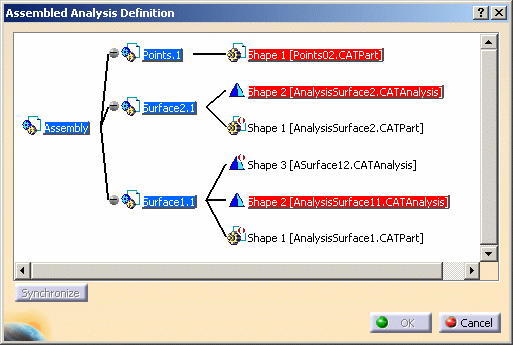
.The Assembled Analysis Definition dialog box appears as shown below:
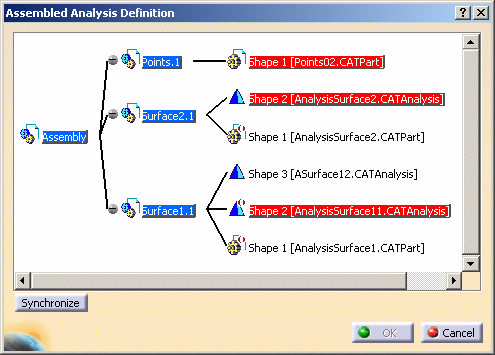

The active shape (Shape 3 [ASurface12.CATPart] in this particular example) is not highlighted.
You have to synchronize the analysis document with the activated shapes. -
Click the Synchronize button.
The Assembled Analysis Definition is updated.
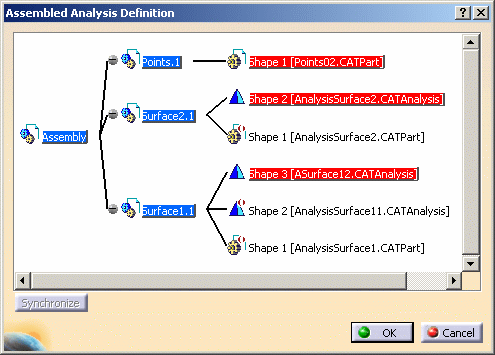
The active shape is now red-highlighted.
-
Click OK in the Assembled Analysis Definition dialog box.
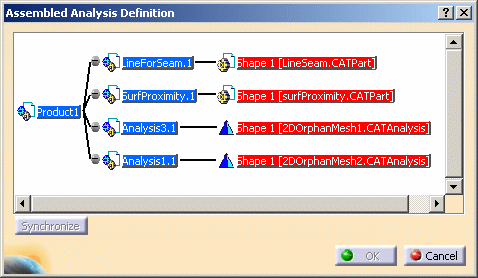
You can find here the specification tree of an assembly of orphan analysis:
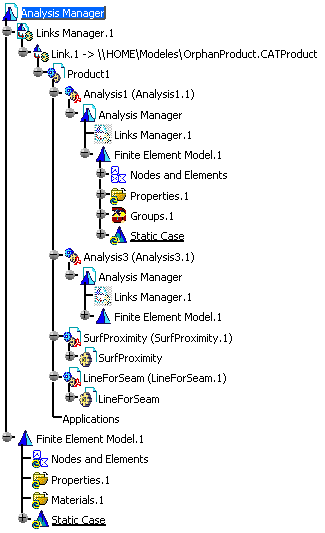
Note that: Analysis1 (Analysis1.1) and Analysis3 (Analysis3.1) are not pointing any geometry.
You can find here the graph of an assembly of orphan analysis: