This task will show you how to create a beam property on a beam imported from the Equipment Support Structures workbench.
The Equipment Support Structures beams will be recognized as features to 1D mesh during the transition (the wire frame along which the section of the beam is swept is the geometry that will be 1D mesh). A beam property will be created as well with mechanical properties imported from the Equipment Support Structures catalogs.
|
|
The only sections supported in the Analysis solutions
are the Standard Catalog Sections of the Equipment
Support Structures workbench. |
Moreover, the beam mesher will accept the selection of an Equipment Support Structures beam and a specific command lets you import the mechanical properties from the model into a beam property.
For more details about the beam creation in the Equipment Support Structures workbench, refer to the Equipment Support Structures User's Guide.
Only available with the ELFINI Structural Analysis (EST) product.
Loads and restraints can be applied only on vertices or
bodies:
| Analysis Entities |
|
|
|
|
Imported Beam Property |
|
|
|
|
1D Mesh Part |
|
|
|
|
Loads |
Acceleration |
|
|
|
Others |
|
|
|
|
Restraints |
|
|
|

Open the sample10.CATAnalysis document from the sample directory.
You have to make a list of sections and create a member in the Equipment Support Structures workbench, then you have to enter in the Generative Structural Analysis workbench.
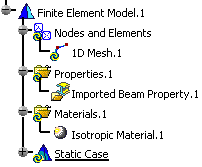
In this example, all the pre-requisites are done. Note that:
-
the Nodes and Elements set contains a 1D Mesh object
-
the Properties set contains an Imported Beam Property object.
-
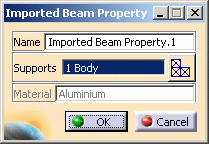
Double-click Imported Beam Property.1 in the specification tree.
The Imported Beam Property dialog box appears.
-
Name: lets you change the name of the property.
-
Supports: lets you select the support on which the imported beam property will be applied.
-
Select Mesh Parts: this button is only available if you have selected a support.
-
Material: gives you information about the material associated to the selected support.
-
-
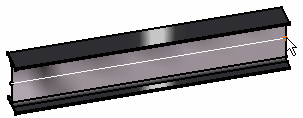
Click the Clamp icon.
The Clamp dialog box appears.
-
Select a vertex as Support.
-
Click OK on the Clamp dialog box.
-
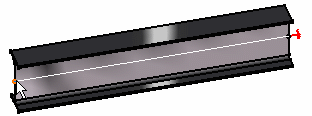
Click the Distributed Force icon.
The Distributed Force dialog box appears.
-
Select a vertex as Support, enter 100N in the Z field.
-
Click OK in the Distributed Force dialog box.
-
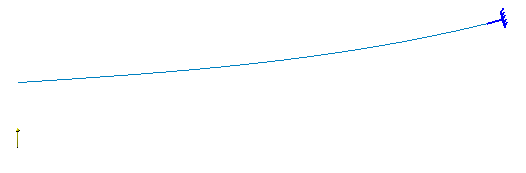
Compute the solution.
To do this, click the Compute icon, select the All option in the Compute dialog box and click OK.
-
Click the Deformation icon.
You can visualize the deformation of the beam.

To have a better visualization of the deformation, you can use the Animate command.
For more details, refer to Animating Images.
![]()