Creating Assembled Masses

This task shows you how to create an assembled mass.

An assembled mass is an entity defined in an assembled analysis and therefore applied on the assembled mesh. This mass is the concatenation of several masses defined in the sub-analyses.

Only available with the Generative Assembly Structural Analysis (GAS) product.

Open the sample14_1.CATAnalysis document from the samples directory.

  1. Click Assembled Masses in the Masses toolbar.

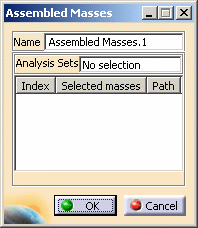
    The Assembled Masses dialog box appears.

    • Name: lets you modify the name of the assembled masses.

    • Analysis Sets: lets you select the mass sets you want to assemble. This field gives you the total number of selected mass sets.

      You cannot select a mass set belonging to the current case (the current case is the one in which you create the assembled masses).

      To select a mass set, you can:

      • Select it directly in the specification tree

      • Use the Edit > Search... menu.

      • Index: gives you the identification number of the selected mass set.

      • Selected Masses: gives you the name of the selected masses.

      • Path: gives you the path of the selected masses.
        You can hide or show the path of the selected mass set using the Show Path contextual menu.

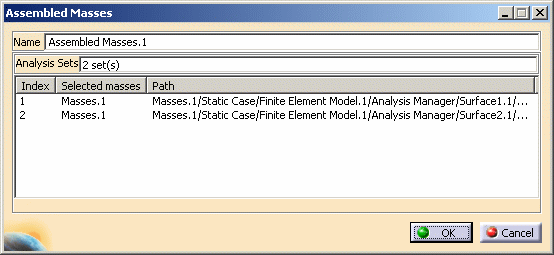
  2. Select in sequence the masses you want to assemble.

    In this particular example, select in the specification tree:

    • Masses.1 set under the first sub analysis (Links Manager.1 > Assembly > Surface1)

    • Masses.1 set under the second sub analysis (Links Manager.1 > Assembly > Surface2).

    If you select a line and then you right-click it you access the following contextual menus:

    • Delete: lets you delete the selected line from the list.

    • Delete All: lets you delete all the content of the list.

    • Show Path: lets you hide or show the path of the selected mass set.

  3. Click OK.

    An Assembled Masses.1 object appears in the specification tree.