-
Import the element using the catalog.
To do so:- Click Catalog Browser
 to open the CatalogOfDevices.catalog.
The dialog box opens: 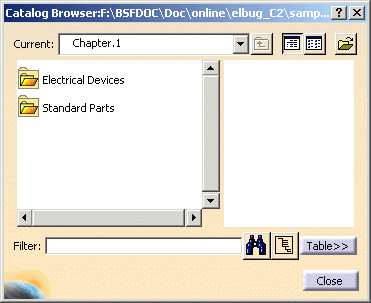
The full path is:
.../online/elbug_C2/samples/CatalogOfDevices.catalog.
- Double-click Standard Parts: the folder content is displayed
- Double-click Parts: the folder content is displayed
- Select FillerPlugStd, drag and drop it onto the Product1 in the specification tree. The standard part is instantiated.
- Close the Catalog Browser.
- Click Catalog Browser
-
Double-click to activate Product1.
It is in the context of this product only that the electrical behavior is added to the part. The reference part remains unchanged. This means that, only in the context of the active product, this part will be seen as an electrical component. -
Click Define Filler Plug
 to convert the FillerPlugStd.
You are prompted to select a product. -
Select the FillerPlugStd (FillerPlugStd.1) product.
The dialog box opens: 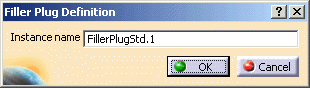
-
Enter FillerPlugElec in the Instance name field and click OK.

Note that it is the instance of the filler plug imported in the assembly, which is modified and not the reference. -
Click Define Cavity Connection Point
 .
.
You are prompted to select an electrical device. -
Select the filler plug either in the specification tree or in the geometry area.
The Cavity Connection Point Definition dialog box opens: 
-
Enter CaCnxPnt in the Name field.
-
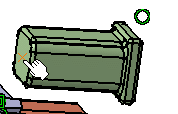
Click the back face as Representation:
-
Define the Placement Constraints as follows:
- Select the point as Contact:
- Select the back face as Coincidence:
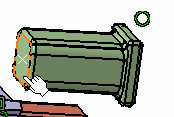
- Select the point as Contact:
-
Click OK to validate.
The cavity connection point (CaCnxPnt) is added to the specification tree. 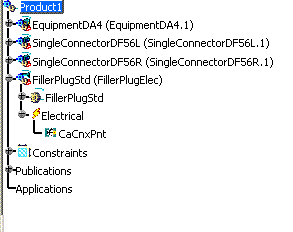
-
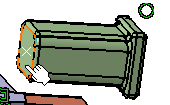
Now connect the filler plug to the equipment using Connect Electrical Devices
 .
.
You are prompted to select an electrical connector. -
Select the filler plug cavity connection point represented by the back face.
-
Click the bottom of the equipment middle cavity.
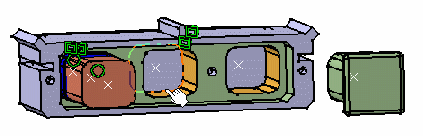
The filler plug is now electrically connected to the equipment and placed at the correct position thanks to the connection point definition.