The devices to be imported from a catalog are:
- An equipment: EquipmentDA4
- Two single connectors: SingleConnectorDF56L and SingleConnectorDF56R
![]()
-
Click Catalog Browser
 to open the CatalogOfDevices.catalog.
The dialog box opens: 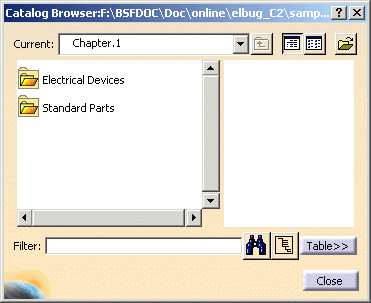
If necessary, use the Open icon  to browse another catalog and select the CatalogOfDevices.catalog
from the samples folder. The full path is:
.../online/elbug_C2/samples/CatalogOfDevices.catalog.
to browse another catalog and select the CatalogOfDevices.catalog
from the samples folder. The full path is:
.../online/elbug_C2/samples/CatalogOfDevices.catalog.
To know more about the Catalog workbench, refer to Using Catalogs. -
Double-click the Electrical Devices: the folder content is displayed.
-
Double-click the Equipments: the folder content is displayed.
-
Select the EquipmentDA4, drag and drop it onto the Product1 in the specification tree.
The equipment is imported:
it is composed of three cavities.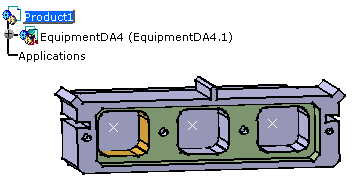
-
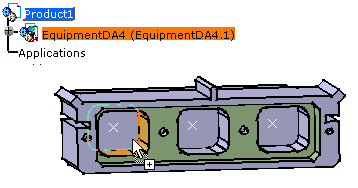
In the Electrical Devices folder, double-click Single Connectors, then
-
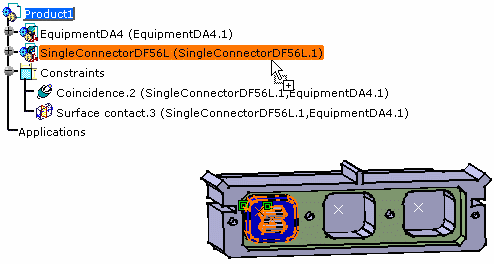
Select the SingleConnectorDF56L, drag and drop it onto the left cavity for example or in the specification tree.
The connector is properly located into the cavity: the constraints are created.
The result looks like this: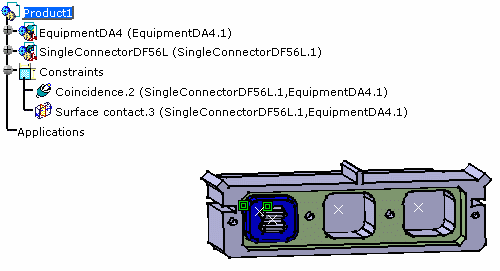

The component is instantiated under the active product. -
Select the SingleConnectorDF56R, drag and drop it onto the SingleConnectorDF56L connector in the specification tree.
The connector is properly located onto the male connector.
The result looks like this: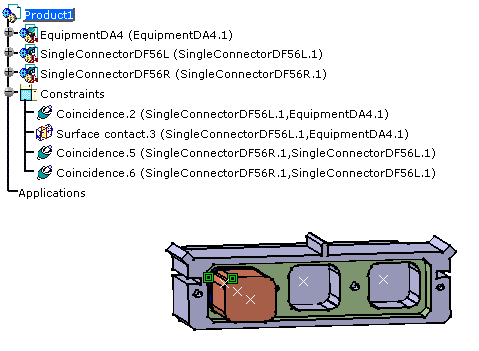
-
Close the Catalog Browser.
For more information, refer to Using Assembly Constraints.