A cavity is used to specify the location of an electrical object when making an electrical connection.
-
Click Define Cavity
 and select an equipment where the cavity is to be defined.
.
The Cavity Definition dialog box opens: 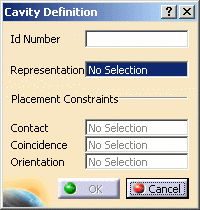
-
Select the electrical device where you want the cavity to be defined.
-
Enter a value in the Id Number field.
Note that the Id Number must be unique. -
Select a Representation, for example a pocket, a pad, a face...
-
Optionally, place a Contact constraint, for example a surface or a point.
-
Optionally, place a Coincidence constraint, for example a surface, a line or an axis.
-
Optionally, place an Orientation constraint, for example a surface, a line or an axis.
The orientation is used to constrain the rotation i.e. the third degree of liberty. -
Click OK to validate.
The specification tree is updated. 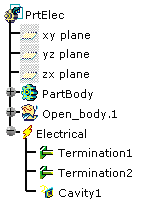
For more information about the placement constraints, refer to Using Assembly Constraints.