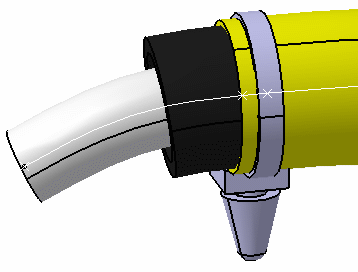
By default, adaptative supports and retainers are always placed on top, and protective tape is always placed over a bundle segment. The diameter or shape of these components automatically adapts itself to the diameter of the components they cover. However, there may be times when you want to change the relationships between components or even, correct a component that is not properly positioned, in order to better represent the various layers of protective coverings and supports on top of bundle segments.
The Adjust command lets you change the
relationship between protective tape, adaptative supports and retainers,
and the components they cover: bundle segments and protective coverings.
For example, you can re-position protective tape placed on top of a bundle
segment and have it placed over another protective covering added to the
same bundle segment at a later date. Note that the graphical representation
of the protective tape, adaptative support or retainer reflects the
relationships defined between components.
This gives you a better representation of components as well as accurate
information letting you plan for manufacturing. Knowing which component is
on top of which other component means you can deduce the placement order of
protective coverings and supports during the process planning stage.
Note: Standard supports and corrugated tube come in fixed diameters and are positioned with respect to the bundle segment routed inside them. By default, they are the outermost components. However, you can place protective tape over these components using the Adjust command.
![]()
Open the Geometrical_Bundle1.CATProduct document.
-
Select the component you want to adjust.
You can select: - Adaptative support
- Retainer
- Protective tape covering.
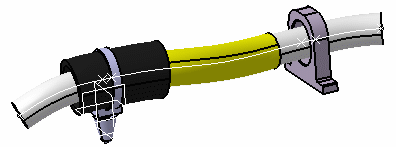
In our example, select the yellow protective tape covering the bundle segment.
-
Select the component you want to place it over:
You can select: - Bundle segment
- Protective covering
- Support, if your first selection was not an adaptative support or retainer.
In our example, select the the corrugated tube.
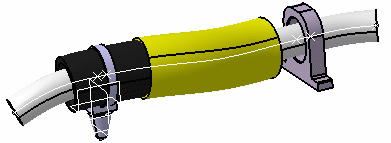
The protective tape is adjusted to cover the corrugated tube. -
Extend the protective tape so that it covers most of the corrugated tube.
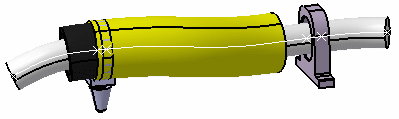
Notice that the adaptative support is still placed over the corrugated tube, and under the protective tape.
-
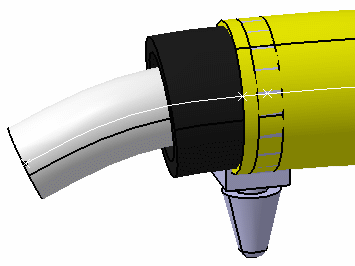
Adjust the adaptative support so that it is placed on top of the protective tape you have just extended.
Important
- You cannot place a single protective covering over several bundle segments.
- You cannot place supports over other supports.
- By default, standard supports and corrugated tubes are the outermost components. However, protective tape can be placed over these components using the Adjust command.
- Protective coverings have a uniform circular shape over the entire
length of the covering. This means that:
- The shape of protective coverings does not change to match the
shape of other protective coverings or supports that are placed
over it:
- Protective tape may clash with supports:
- The inner diameter of corrugated tube does not change to match
the different diameters of a bundle segment. The diameter remains
constant.
- The shape of protective coverings does not change to match the
shape of other protective coverings or supports that are placed
over it:
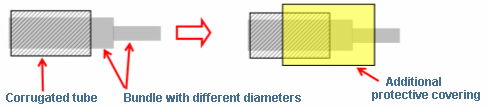
Protective Coverings and Multi-profile Bundle Segments
![]()
Protective coverings do not handle multiple profiles: they
keep circular profiles only.
The radius of the profile for protective tape is computed as follows:
Radius = sqrt(Max(Area)/PI)
wherePI= 3.14159...
andsqrt= square root.