Main steps are:
- Creating an assembly using Electrical Harness Assembly commands
- Creating an assembly template
- Storing the template in a catalog
- Instantiating the assembly.
Catalog assemblies are document templates.
![]()
-
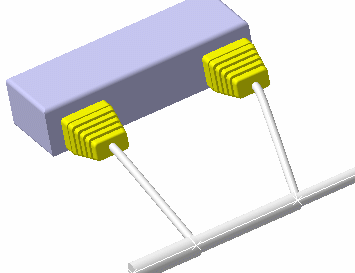
Create your harness assembly as normal using Electrical Harness Assembly commands.

-
Create an assembly template.
-
Select Insert > Document Template Creation...
The Document Template Definition dialog box appears. -
In the Documents tab, set devices to Same document Action status (Switch between New Document and Same Document). In our example, the plug.
This means you will use the existing catalog reference for these devices.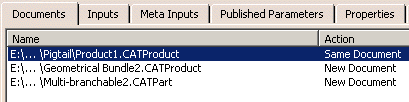

Any devices except adaptive supports must be set to Same document Action status. -
Select the Inputs tab to see the point used when instantiating the template.
-
Click OK when done.
-
Save the document.
-
-
Store the assembly template in a catalog.
-
Open the catalog in which you want to store the template.
The Catalog Editor workbench opens showing the contents of the catalog. -
Activate the family to which you want to add the template.
-
Click Add Component
 to associate the appropriate assembly template.
The Description Definition dialog box appears. -
Click Select external feature, then select the document template in the specification tree of the document containing your template.
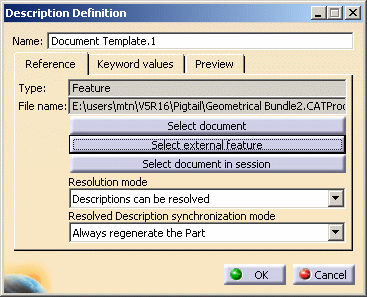
-
Click OK in the Description Definition dialog box.
The harness assembly template is added to the catalog. -
Save the catalog when done.
-
-
Instantiate the assembly.
-
Switch to the Electrical Harness Assembly workbench.
-
Select Catalog Browser
 .
. -
In the Catalog Browser, double-click the assembly template you created.
The Insert Object dialog box appears. 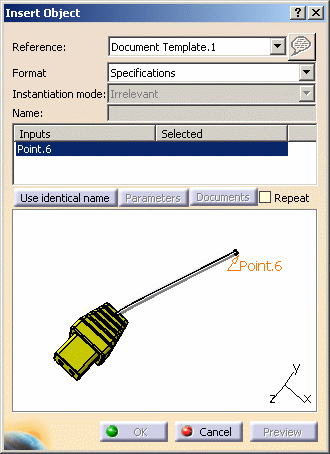
-
In your design document, select the point at which to position your assembly template, then click OK.
-
Repeat to instantiate the assembly as many times as desired.
Note: All points are instantiated at the same location. -
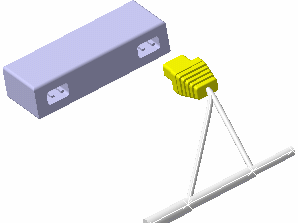
Using the Electrical Assembly Design workbench, connect plugs to cavities to complete your design.
-