Assigning Equipment, Connectors
& Contact Points to Signals
 |
This task explains how to
assign equipment, connectors and contact points to signals
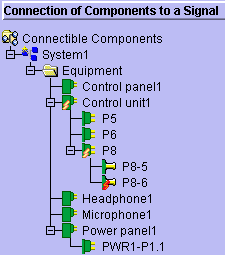
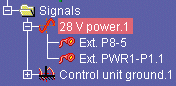
In this example, you will assign contact point P8-5 and connector PWR1-1 to
the 28 V power signal. |
 |
Open the AssignSignals.CATProduct document from the samples folder. |
 |
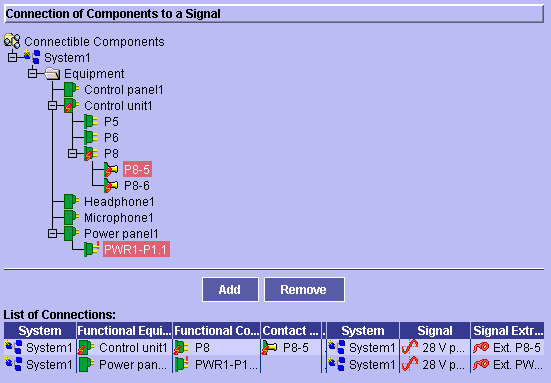
-
Select the signal to which you want to assign one or more
electrical components in the tree view.
The selected signal becomes the current object.
-
Click the
Assign View button
 in the Workshop Commands toolbar.
| The Assign View allowing you to
assign equipment, connector and contact points to signals is
displayed. |
-
Expand the tree to see the various electrical components
that can be connected in the top half of the view.
-
Select the equipment, connector(s) or contact point(s)
you want to assign to the current object.
Notes:
- Ctrl-click components to select more than one.
- Assigning a component to a group signal assigns the component
to all the signals in the group.
|
-
Click Add.
| Selected components are added to the list of connections. |
| Note: The entire path down to the selected
component is identified in the list of connections. |
-
Click OK to validate entries made.
| Connections
are made and an end point is created under each connected signal. |
 |
 |
|
|
 |
In Assign views, information is validated when you click [OK]
in the Assign view, when you change the current object in the tree view or
when you change the active view. |

|