The image below shows the document created using the ELD schematic, with the motor repositioned and a section placed on it.
![]()
| |
This task shows you how to route a loft through a series of hangers. | |
|
|
When you route a cableway through hangers you create a lofted pathway from hanger to hanger. The cableway is not a run. The task Creating a Lofted Pathway has a more detailed explanation. | |
|
|
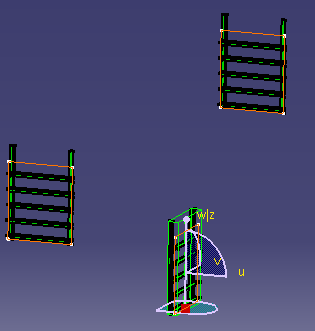
Using Hanger Design, place a series of hangers, preferably with a turn or an offset similar to that shown in Step 2. | |
|
|
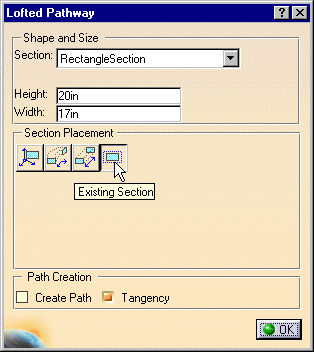
1. | Click the Lofted Pathway button
|
| 2. | In Section Placement select the
Existing Section button. Select the white rectangle on each hanger,
beginning with the first one placed, or where you want to begin the
cableway. The hangers will highlight.
|
|
|
|
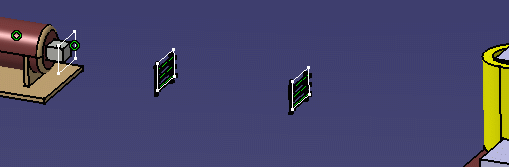
If you are connecting
the loft to a piece of equipment you must first place a section on that
equipment (you don't need to do it for hangers - rack trapeze hangers have
sections placed during part creation time). See the task
Creating a Lofted Pathway, which has a more
detailed explanation of this process.
The image below shows the document created using the ELD schematic, with the motor repositioned and a section placed on it.
|
|
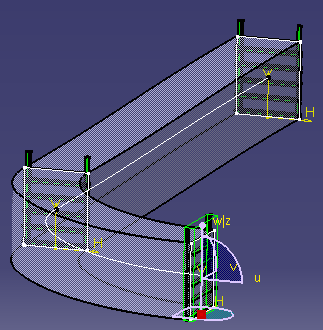
| 3. | To preview the path, check the
Create Path option. The cableway previews.
|
|
| 4. | Click OK. The cableway through the hangers is created. | |
|
|
||