The cavity connection point is used to specify how the connector is placed in the cavity when connecting.
![]()
-
Click Define Cavity Connection Point
 .
. -
Select the connector where you want the cavity connection point to be defined.
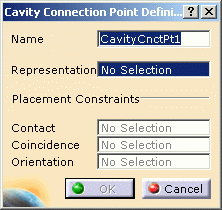
The Cavity Connection Point Definition dialog box opens:
-
Change/enter a value in the Name field.
-
Select a Representation, for example a pocket, a pad, a face.
-
Optionally, set a Contact constraint, for example a surface or a point.
-
Optionally, set a Coincidence constraint, for example a surface, a line or an axis.
-
Optionally, set an Orientation constraint, for example a surface, a line or an axis.
The orientation is used to constrain the rotation i.e. the third degree of liberty. -
Click OK to validate.
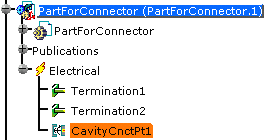
The specification tree is updated.
For more information about the placement constraints, refer to Using Assembly Constraints.