If it is not displayed, open the Getting_Started1.CATPart document.
-
Click Pad
 .
.
The Pad Definition dialog box is displayed. -
Click Sketch
 in the Pad Definition dialog box.
-
Select Plane.2 either from the geometry area or the specification tree. You are now in the Sketcher Workbench.
-
Click Create Datum
 in the Tools toolbar to deactivate the History mode.
 -
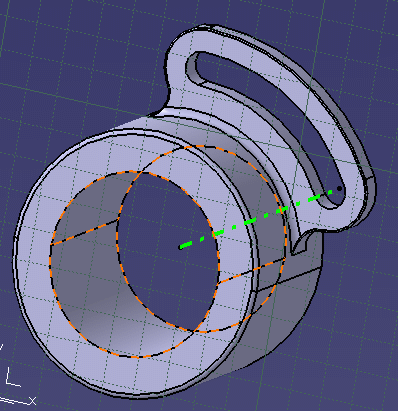
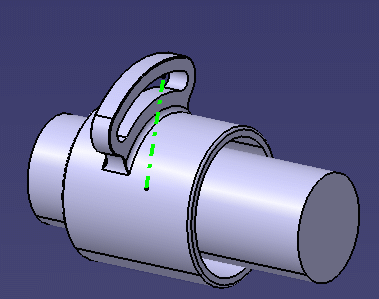
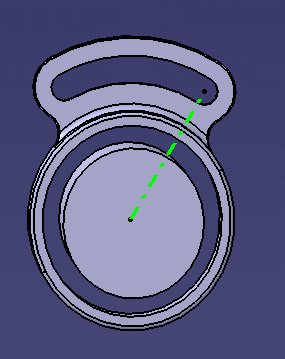
Select the internal cylindrical surface of the part as shown here.
-
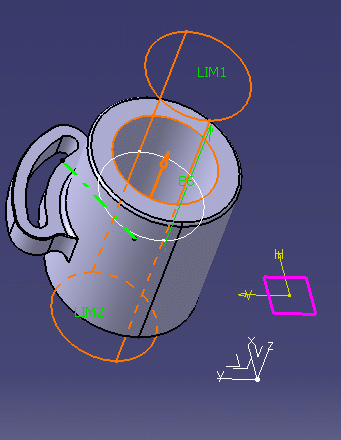
Select Project 3D Elements
 in the Operation toolbar.
The projection is created. -
Select Exit Workbench
 from the Workbench toolbar.
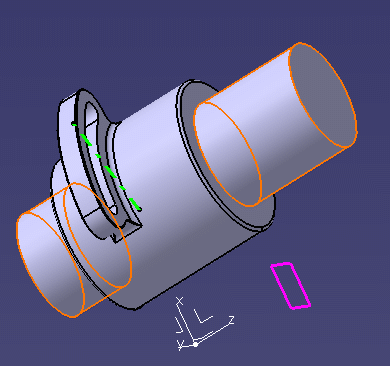
You are now back in the Part Design workbench. Both the part and the dialog box are still displayed.
-
Set the length value.
-
Select Mirrored extend.
The part will be displayed as shown here based on the newly created Sketch.3.
-
Click OK in the Pad Definition dialog box.
The pad has been created and now edit Sketch.1.
-
Double-click Sketch.1 from the specification tree.
You are now back in the sketcher workbench.
-
Double-click the smallest circle radius value from the geometry.
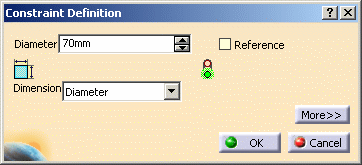
The Constraint Definition dialog box is displayed.
-
Change the radius value to 70mm for instance.

-
Click OK in the dialog box.
The created pad has not been updated as elements created with the Datum mode activated are no longer associative the other geometry.
- the associativity between elements is no more kept when using the Datum mode.
- this option has the same effect when using the Offsetting a use-edge element.
- a click on the icon activates the Datum mode for the current or the next command.