|
|
This task shows you how to create a profile feature. A profile feature
is made of a set of curves, connected or not. When an output profile is created, its geometry is automatically removed from the sketch feature 3D result. In other words, output profiles are made available and updated independently from the sketch within the 3D area. You can use profile features for creating Part Design or Generative Shape Design features. |
||
|
|
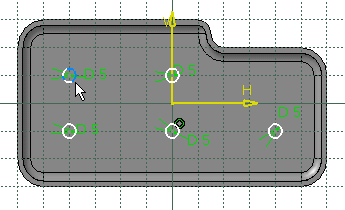
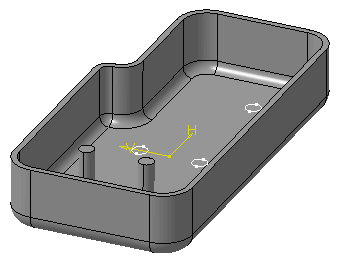
Open the Sketcher_03.CATPart document and double-click Sketch.2 to edit it. | ||
|
|
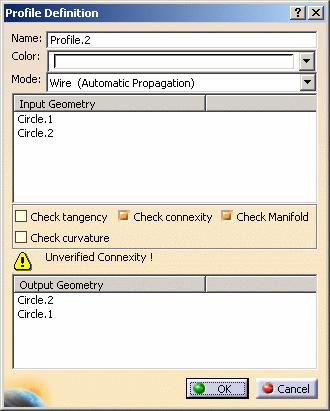
The geometry you selected is displayed in the Input Geometry field, the resulting geometry, that is all geometrical elements that eventually are exposed in the 3D area, in the Output Geometry field.
|
||
|
Whenever
you wish to remove elements from the selection, just right-click the
element of interest and select Delete. Alternatively,
just select the element in the geometry area again.
|
|||
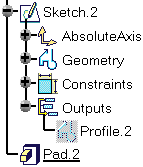
|
Note that the profile does not appear under Pad.2. |
|||
 |
|||
Profile Definition Dialog BoxColor The color helps you distinguish the elements that are part of the selection. Once in the 3D area, that color is kept. Indeed, unlike in the Sketcher, the profile feature is visualized in the 3D area with the color you assigned to it in the Sketcher. For the purpose of our scenario, set the blue color. The selected line as well as an additional line are now displayed in blue. Note that line thickness is also increased to help you view the selected elements that will be exposed in the 3D area. Mode Output profiles can be defined only from geometrical elements belonging
to the same sketch.
Options Four options let you validate the profile definition. Note that the connexity and the manifold property of the profile are checked by default. Once checks are performed, warning messages may be displayed to help you decide whether you keep your definition as such or if you need to modify it. Moreover, update errors appear for features causing trouble once you have left the Sketcher workbench. Several checks can be performed, you just need to select the appropriate option:
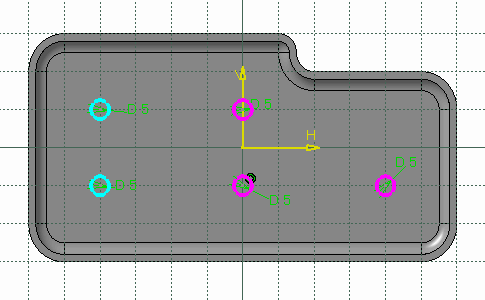
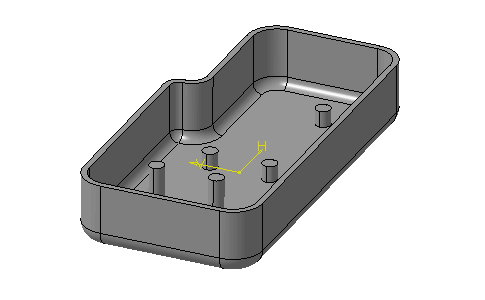
Reusing Input GeometryThe geometry already used to define a profile
feature can be reused for the definition of another profile. Using the
sketch of our scenario, for example you can create a new profile feature as
shown in magenta, and create a new pad:
|
|||
Cutting, Copying and Pasting Output ProfilesIn the Sketcher, you are not allowed to cut or copy then paste output profiles. Conversely, in the 3D area, you can use the Cut or Copy commands. In that case, you obtain datum features. Deleting Output ProfilesYou can delete output profiles in the Sketcher only. Deleting an output profile does not affect the geometry used to define that profile. Hiding or Showing Output ProfilesIf outside the Sketcher you apply the Hide/Show capability on a sketch node, the capability applies to all elements except for output profiles. |
![]()