Digitized Shape Editor provides a series of tools to check the quality of the mesh and to improve it.
![]()
![]()
![]()
-
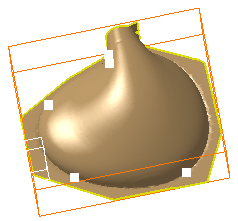
Click Information and select the mesh.
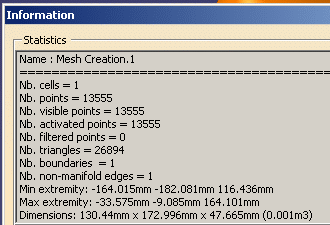
You can see that there is one non-manifold edge.
![]()
-
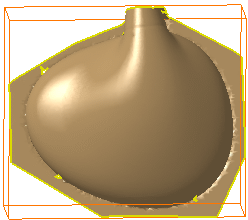
Click Cloud Display Options
 and select the mesh.
Select the Free Edges, Non-manifold Edges and Flat check boxes.
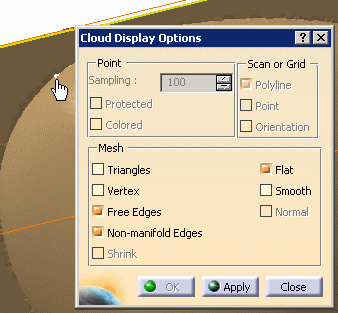
You can see there is one free edge, some non-manifold edges (displayed in white)
The seam between the rounded and the flat areas could do with some improvements.
![]()
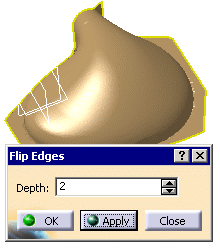
Now let's flip edges of triangles of the mesh, for a better respect of sharp edges.
-
Click Flip Edges
 in the Mesh toolbar and select the mesh. The mesh goes to flat
visualization.
in the Mesh toolbar and select the mesh. The mesh goes to flat
visualization.
Depth determines the amplitude of the reorganization of the triangles.
-
Click Apply. You can see that the sharp edge has been improved.
You can repeat this step several times until the result is satisfactory. -
Then click OK to validate the action and exit the dialog box.
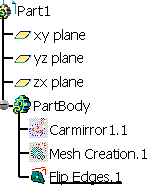
The initial mesh is sent to the No Show and replaced by a new mesh Flip Edge.1.
![]()
-
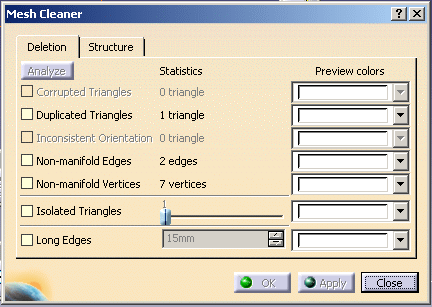
Click Mesh Cleaner
 and select Flip Edge.1.
Push the Analyze button.
and select Flip Edge.1.
Push the Analyze button.
When a problem is found, the corresponding line is highlighted.
Select those check boxes.
-
The incorrect sites are highlighted on the mesh
(in white by default, you can change it in the Preview colors lists).
-
Click Apply to remove the defective elements.
You may click Apply several times to remove all defective elements.
Click OK when you are satisfied.
![]()
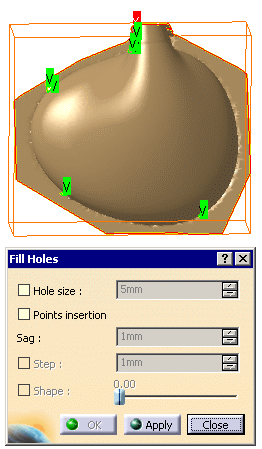
This can be corrected with Fill Holes:
-
Click Fill Holes
 in the Mesh toolbar and select Flip Edge.1.
The action searches the free edges of the mesh.
By default, the largest free edge, generally the outer boundary of the mesh, is displayed in red,
with an X label, meaning it is not candidate for hole filling.
The smaller free edges are displayed in green and are candidate for hole filling.
-
Click Apply. New meshes are computed on the holes.
-
Click OK to validate the holes filling and exit the action.
![]()