-
Click Mesh Creation
 in the Mesh toolbar and select the cloud of points you have
imported.
in the Mesh toolbar and select the cloud of points you have
imported.
Click Apply. The mesh is computed on the cloud of points.
-
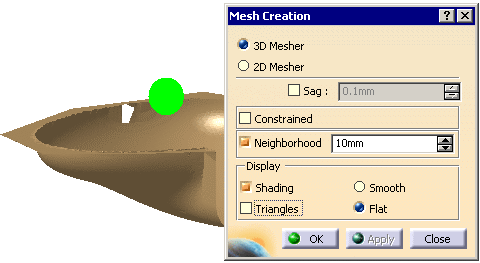
You can see that some triangles of this mesh are not displayed.
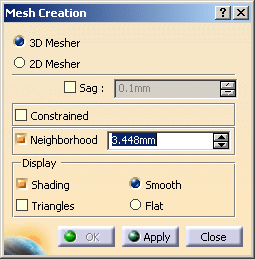
If you increase the value of Neighborhood, you can see that more triangles are displayed.
Note that the Neighborhood value is represented by the green sphere on the screen.
Its size is updated as you increase or decrease the value in the dialog box.
You can pick the cloud to move this sphere to this spot. -
Select the Shading check box and clear the Triangles check box for a better display of the mesh.
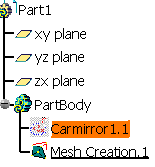
You can also select Carmirror1.1 in the specification tree and use the contextual menu to hide the cloud of points.
-
Once you are satisfied, click OK to validate the mesh and exit the action.
This is the case for all actions that generate a cloud of points, with the exception of the Import action for files imported individually.